Cones of Light
· Electronics · Code · 3D & CAD
Designed and built a dynamic light sculpture using paper cones and addressable LEDs. Programmed using Processing and Python interfacing with Fadecandy hardware.
Since the start of my days as a theatrical lighting designer in high school, I’ve had a fascination with light and what it can do to a space. As Mark Leslie once said, “An actor without techies is a naked person standing in the dark trying to emote…” — no matter how interesting, impactful, beautiful, or cool the things we create are, light plays a key role in sharing what we make with others.
But what happens when the thing we’re lighting isn’t a talented performer or popular musician, but rather a mundane object most of us don’t glance twice at?
To me, this begged the question: how can I use light to play with ordinary objects?
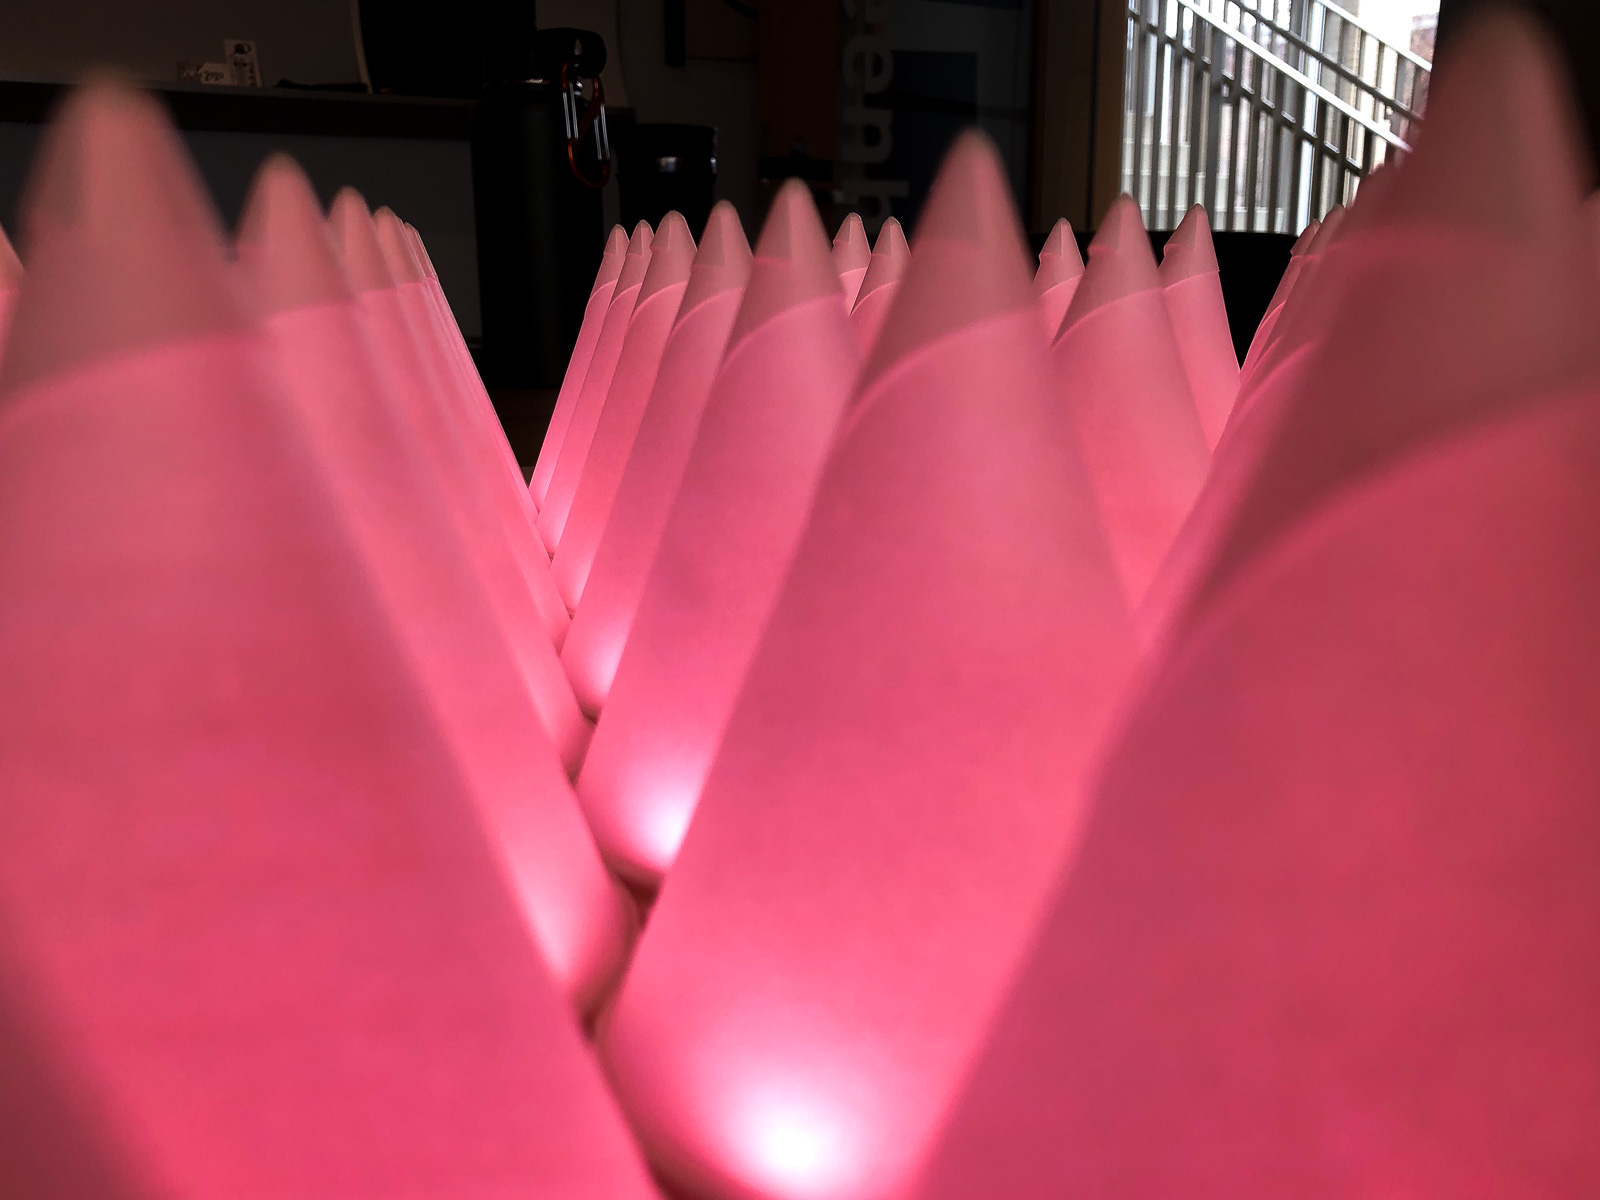
I also think there’s wonder in repetition - especially when the thing that’s being repeated isn’t particularly exotic. A classic example is Warhol’s Campbell’s Soup Cans — individually, they’re just cans of soup, but at scale the work takes on a new meaning. I’d been wanting to experiment with this idea as it relates to light for some time, so when my roommate brought back about 500 snow cone cups (source unknown), I new I had to seize the opportunity!
Design
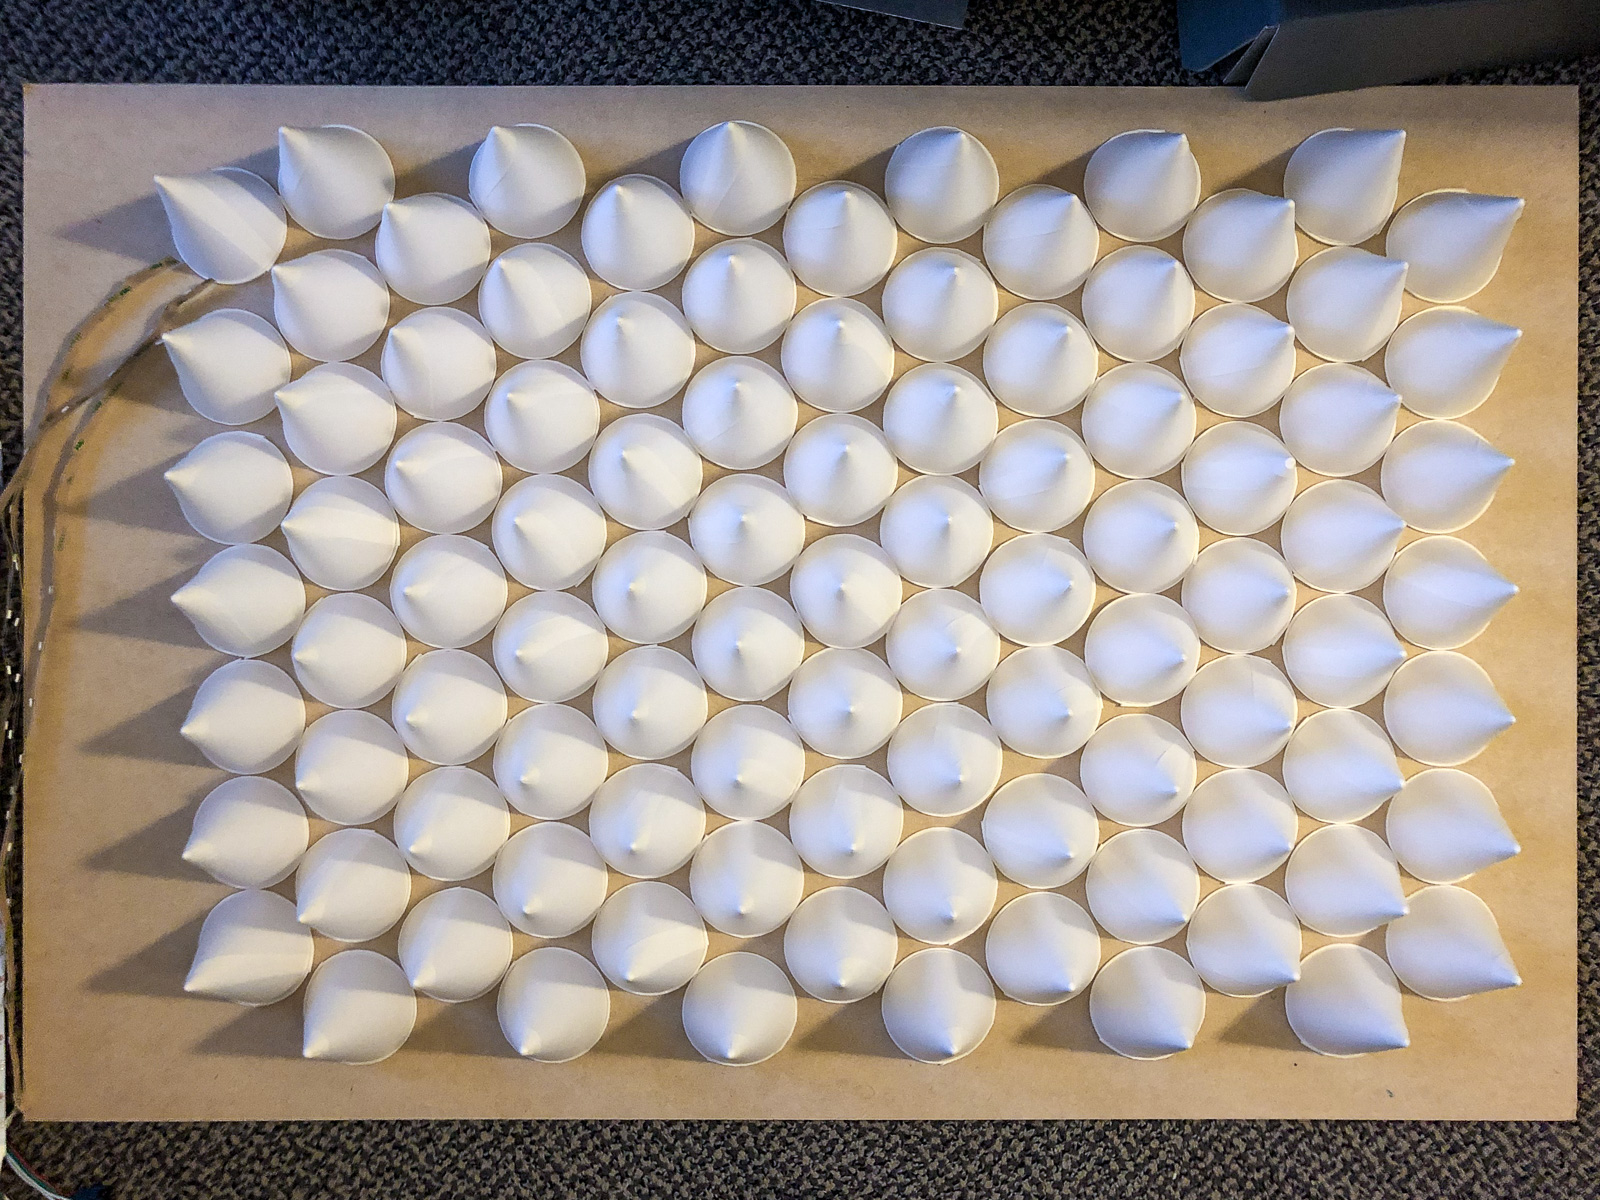
I started by experimenting with cone different arrangements on a piece of composite board I found in a scrap pile. I opted for an isometric grid which minimizes the empty space between cones and produces some cool layering when viewing from the side.

I experimented with some different lighting sources for the cones and ultimately settled on a matrix of addressable LEDs (loving known as NeoPixels). These little suckers produce great output for their size, and come in almost every flavor an aspiring light-sculptor could dream of.
Tech
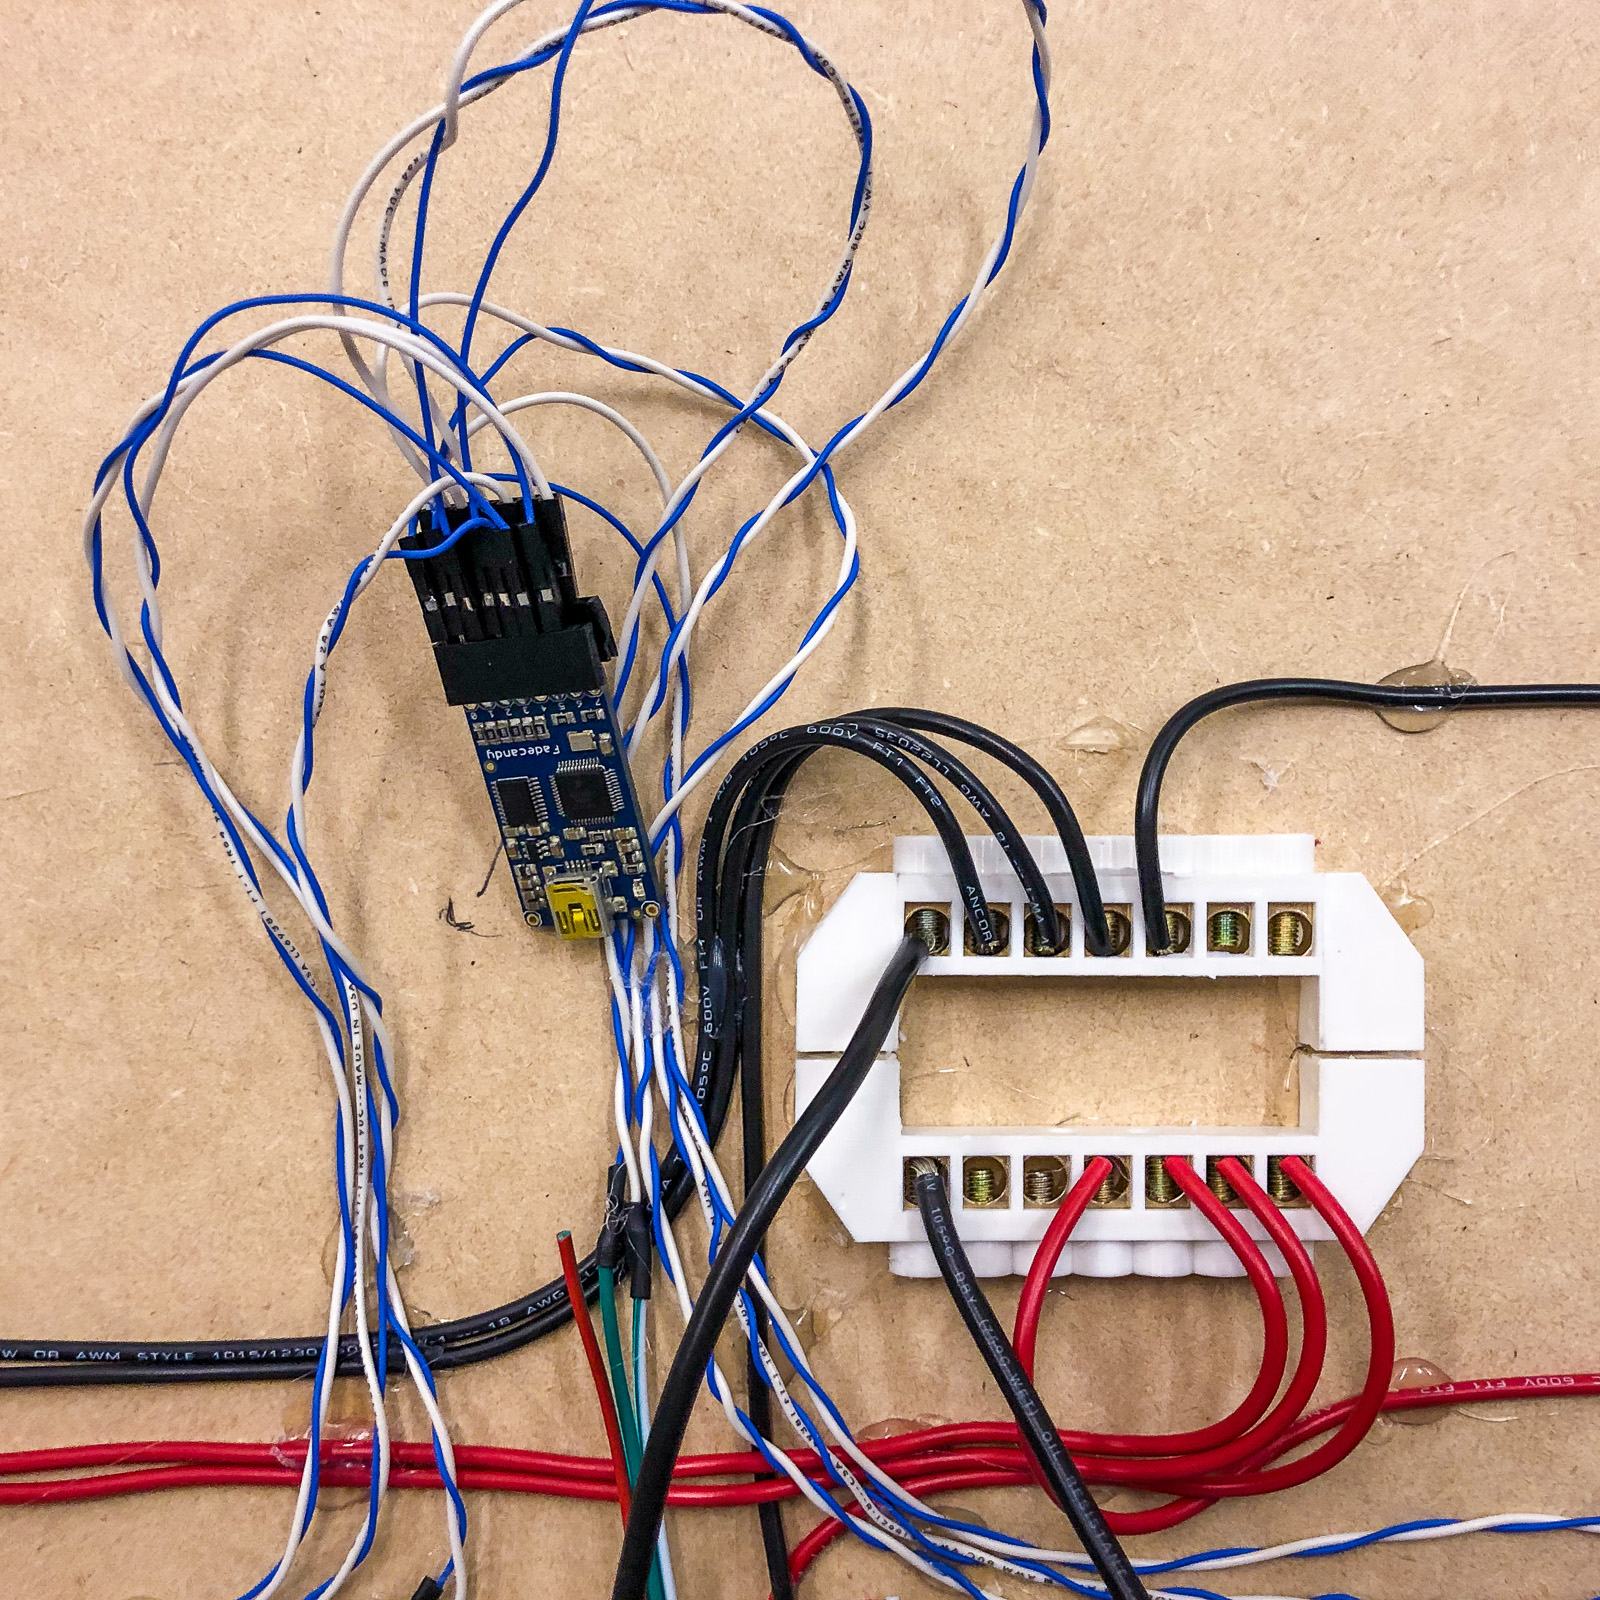
From previous exploration in the world of NeoPixels, I knew that I’d need more than a microcontroller to create the types of visuals I wanted on a large set of these LEDs. The Fadecandy board — a favorite among NeoPixel enthusiasts like myself — was once again the perfect candidate for this project.
It allows you to compute the visuals you wish to render on a host machine (i.e. a Raspberry Pi or laptop) and stream it live to the Fadecandy board itself via USB, which in turn produces the PWM signals to drive the addressable LEDS. Since I planned to use less than 512 pixels, one board was the perfect solution.
Construction
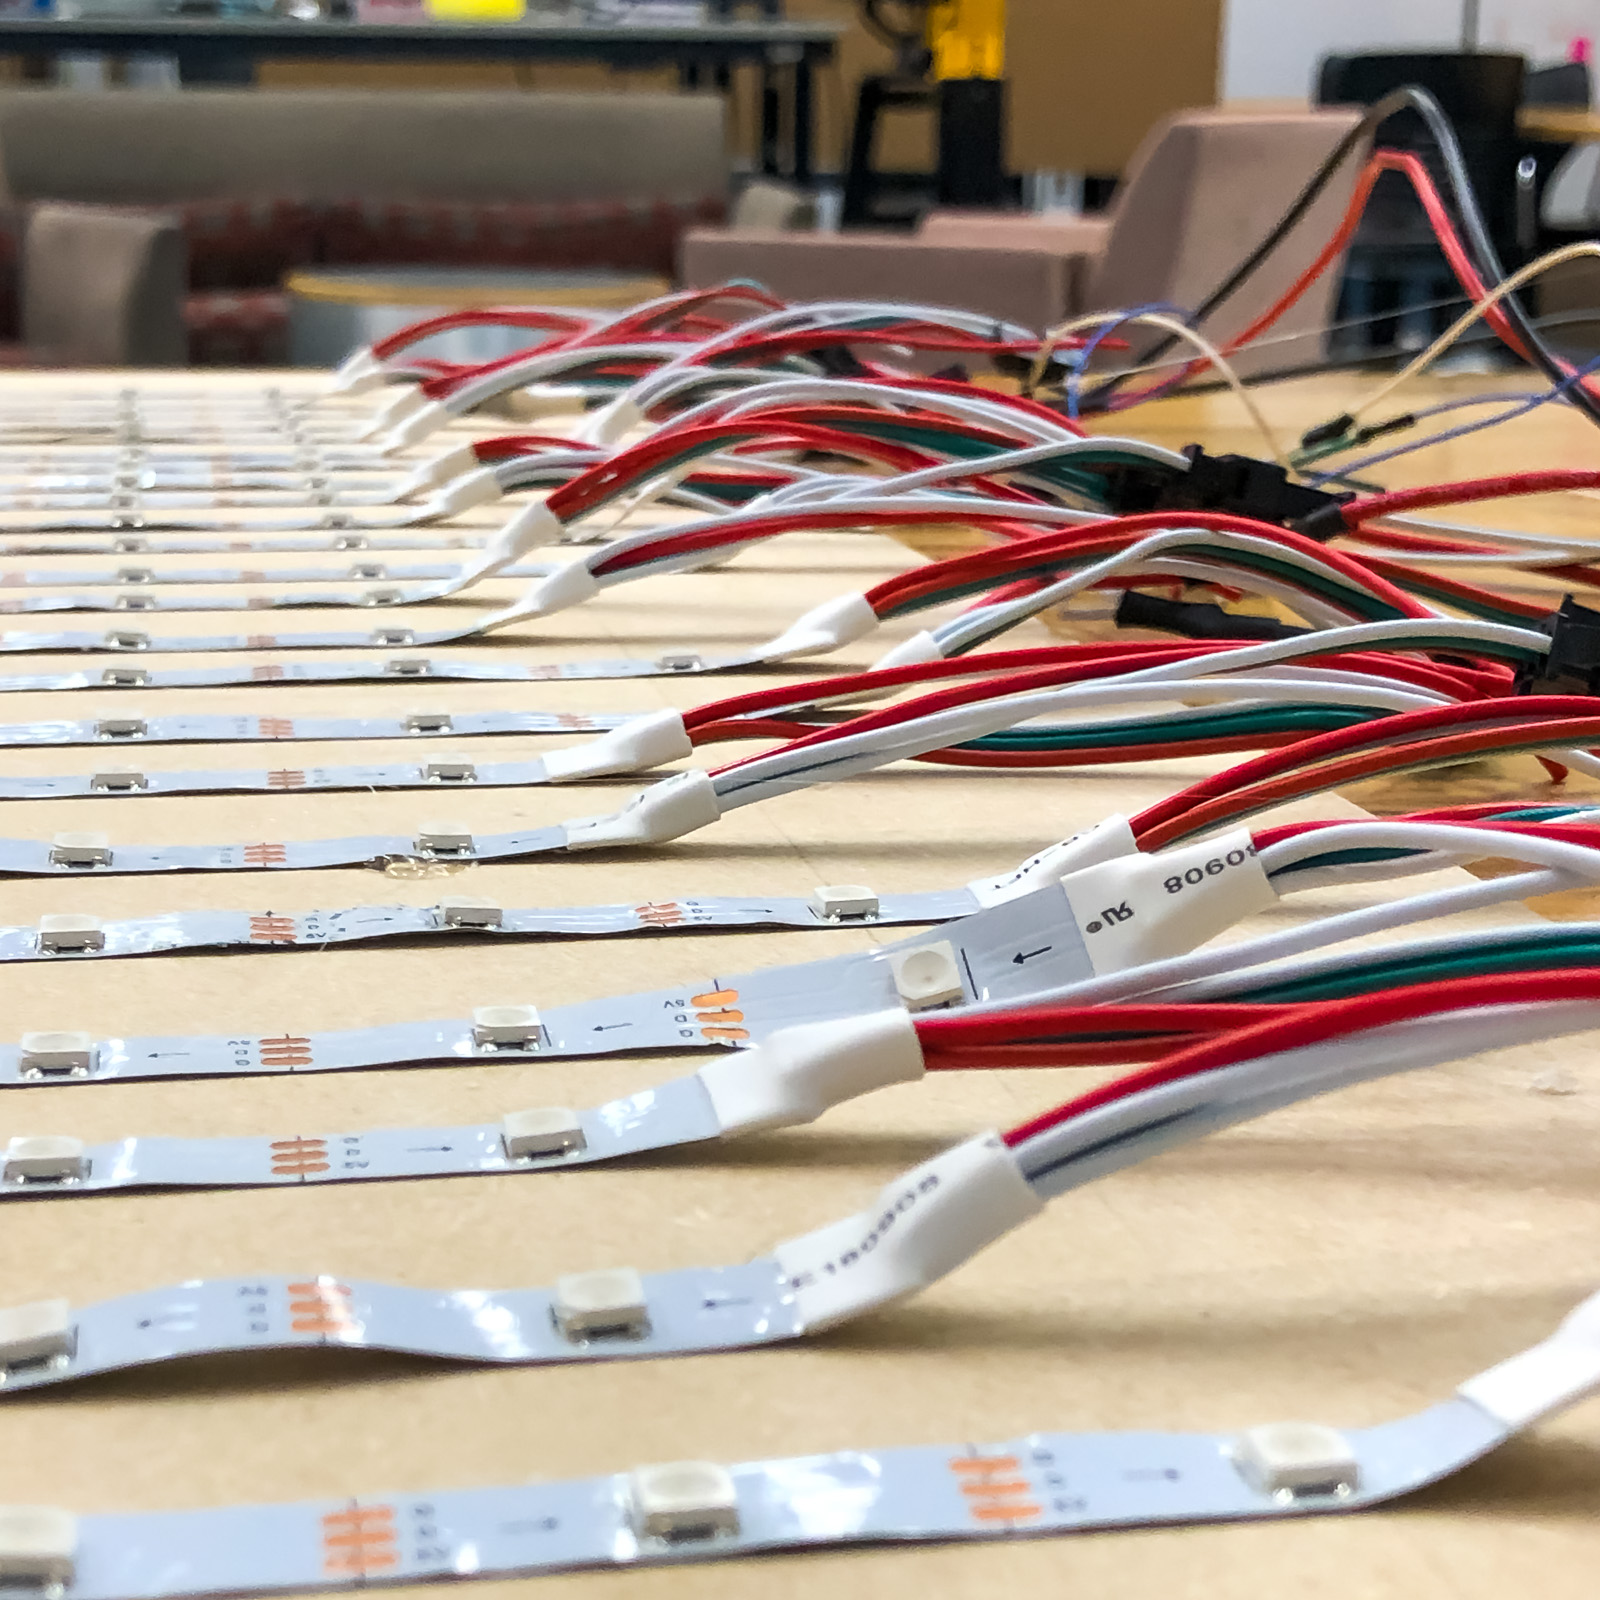
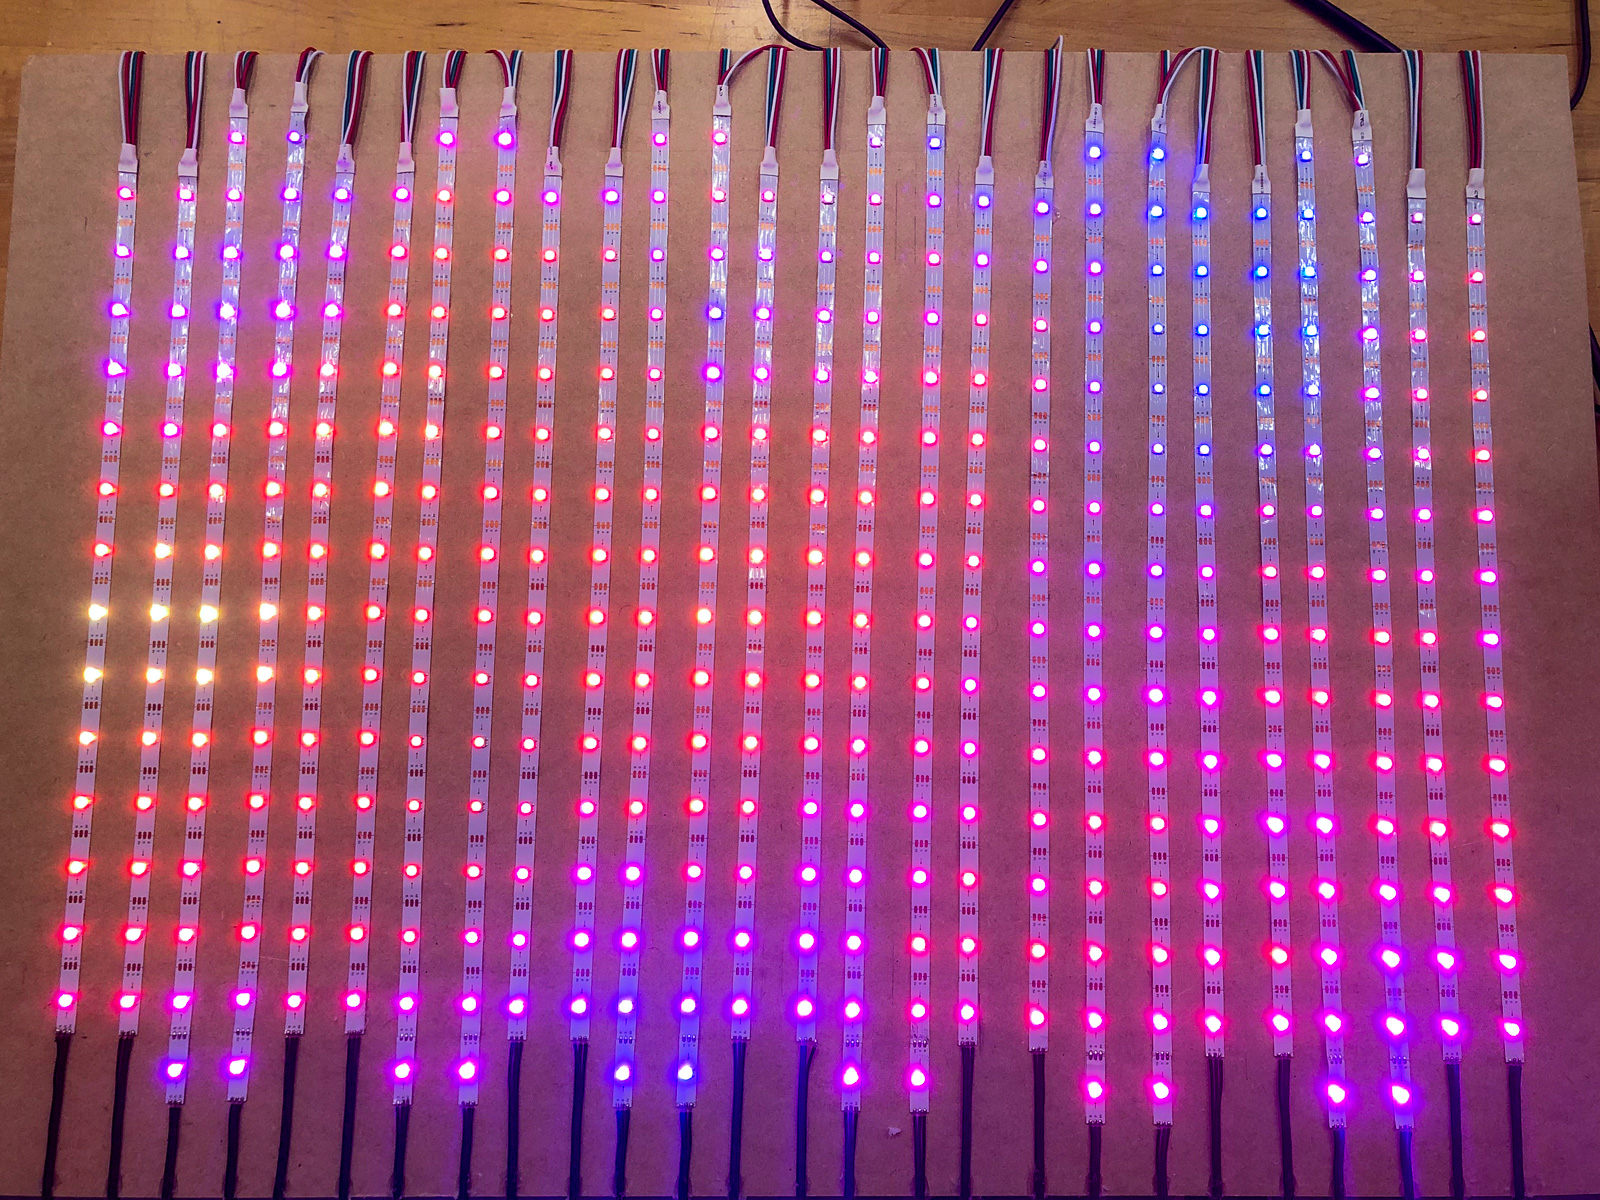
Luckily for me, the size of the cones nearly perfectly lined up with the pitch of the NeoPixels on the 30 LED per meter strips I had. This worked out to 4 LEDs per cone, in pairs of squarely spaced strips as shown below:
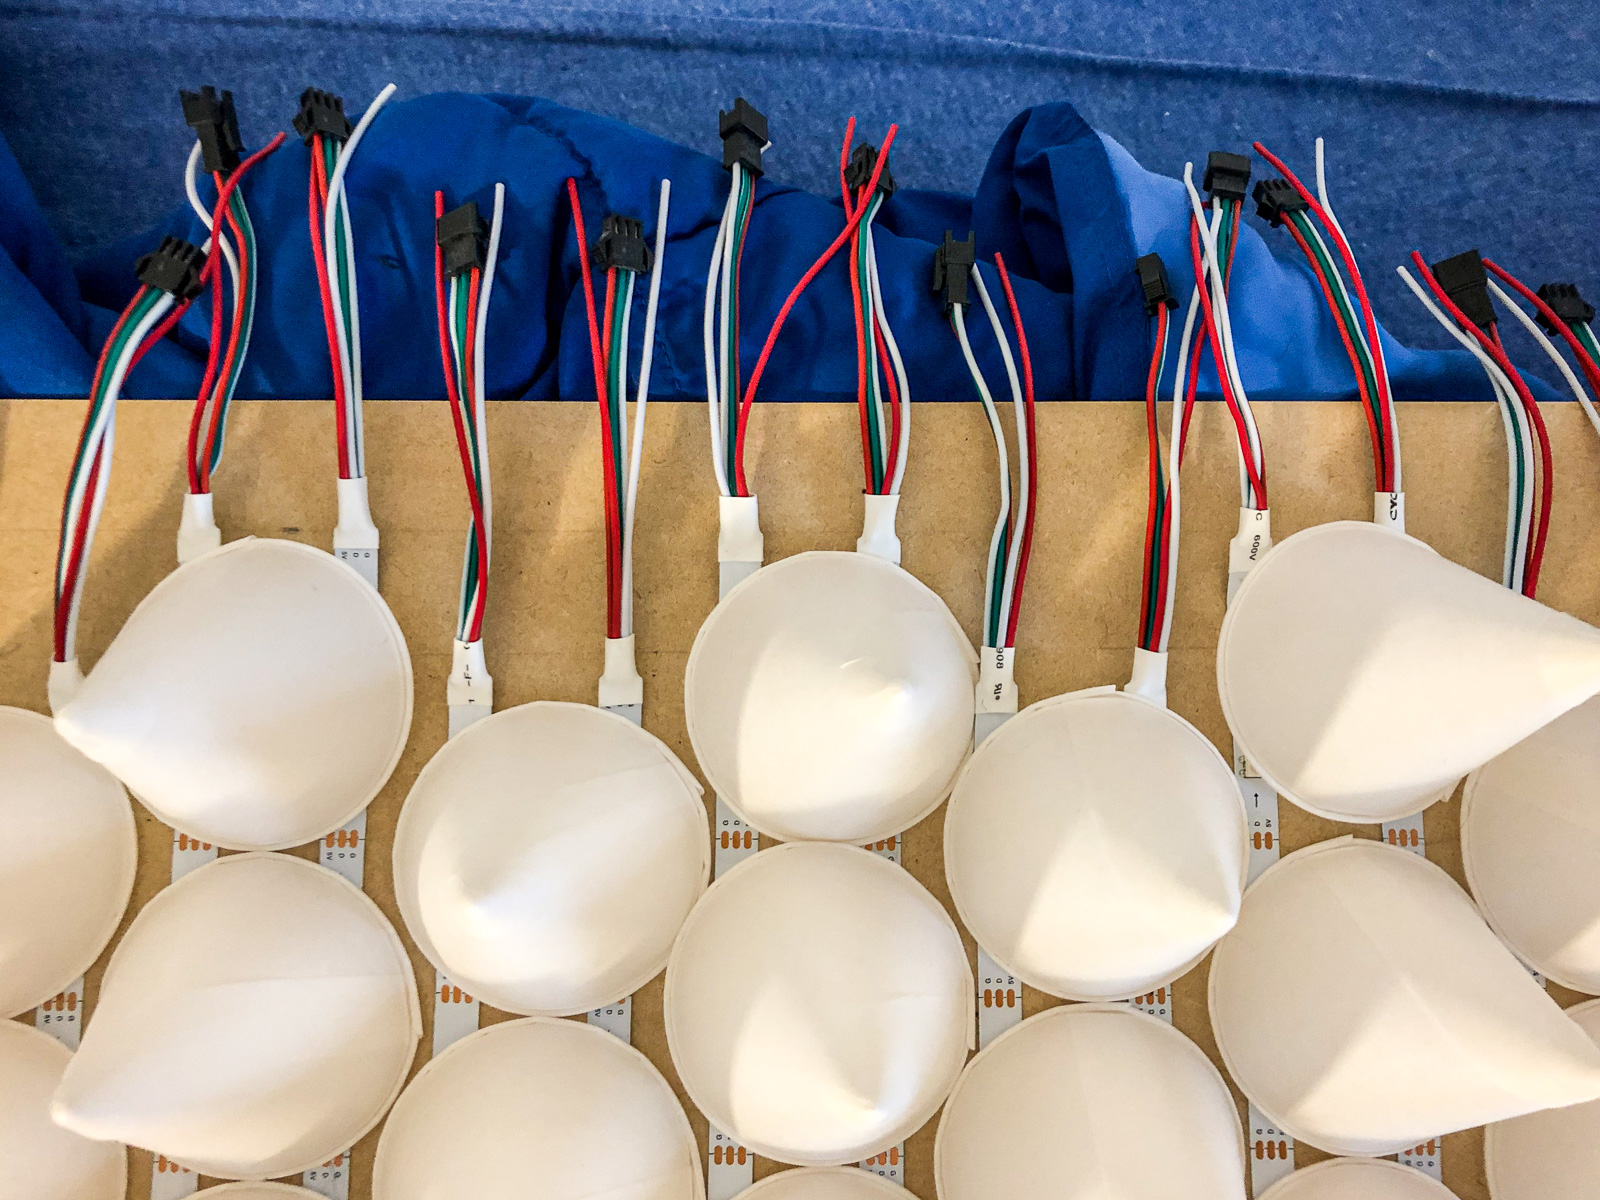
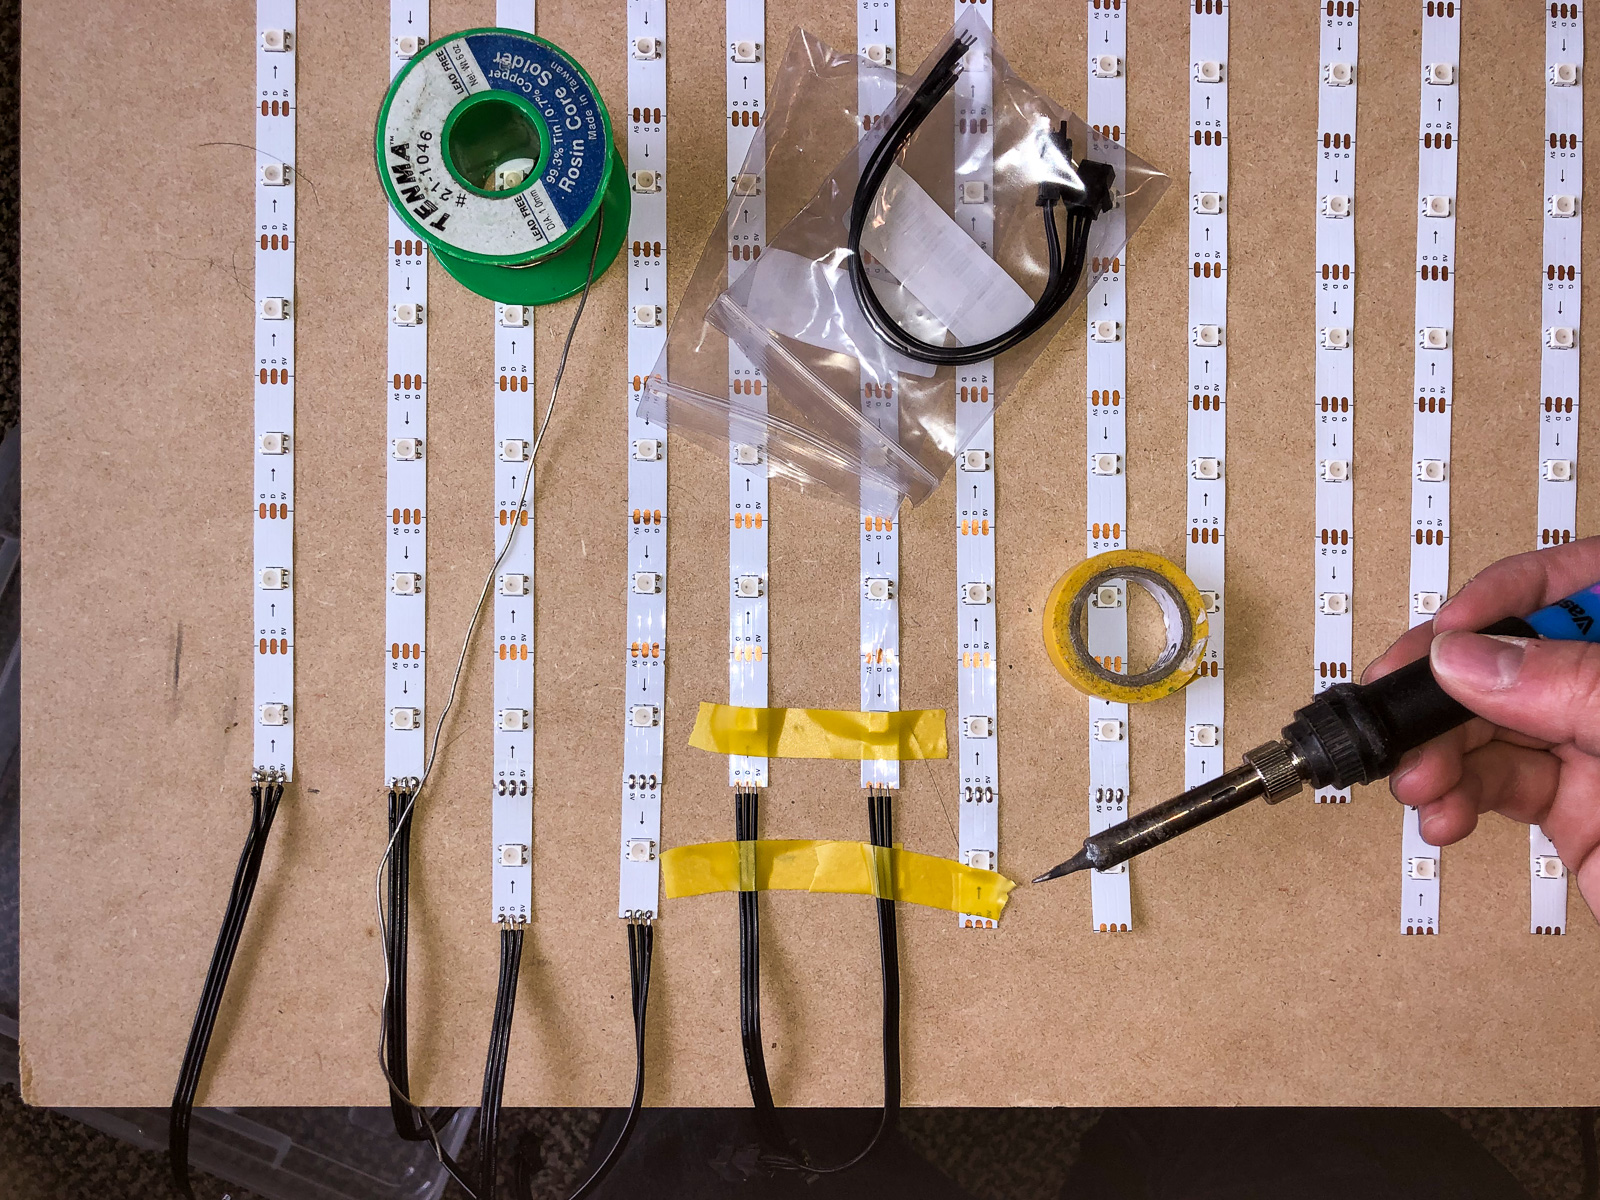
My strips came in 1-meter lengths, which I cut accordingly to fit sets of 7 and 8 cones per pair of strips. For the ends without pre-soldered JST connectors, I attached my own after securing the strips to the particle board with their sticky back tape.
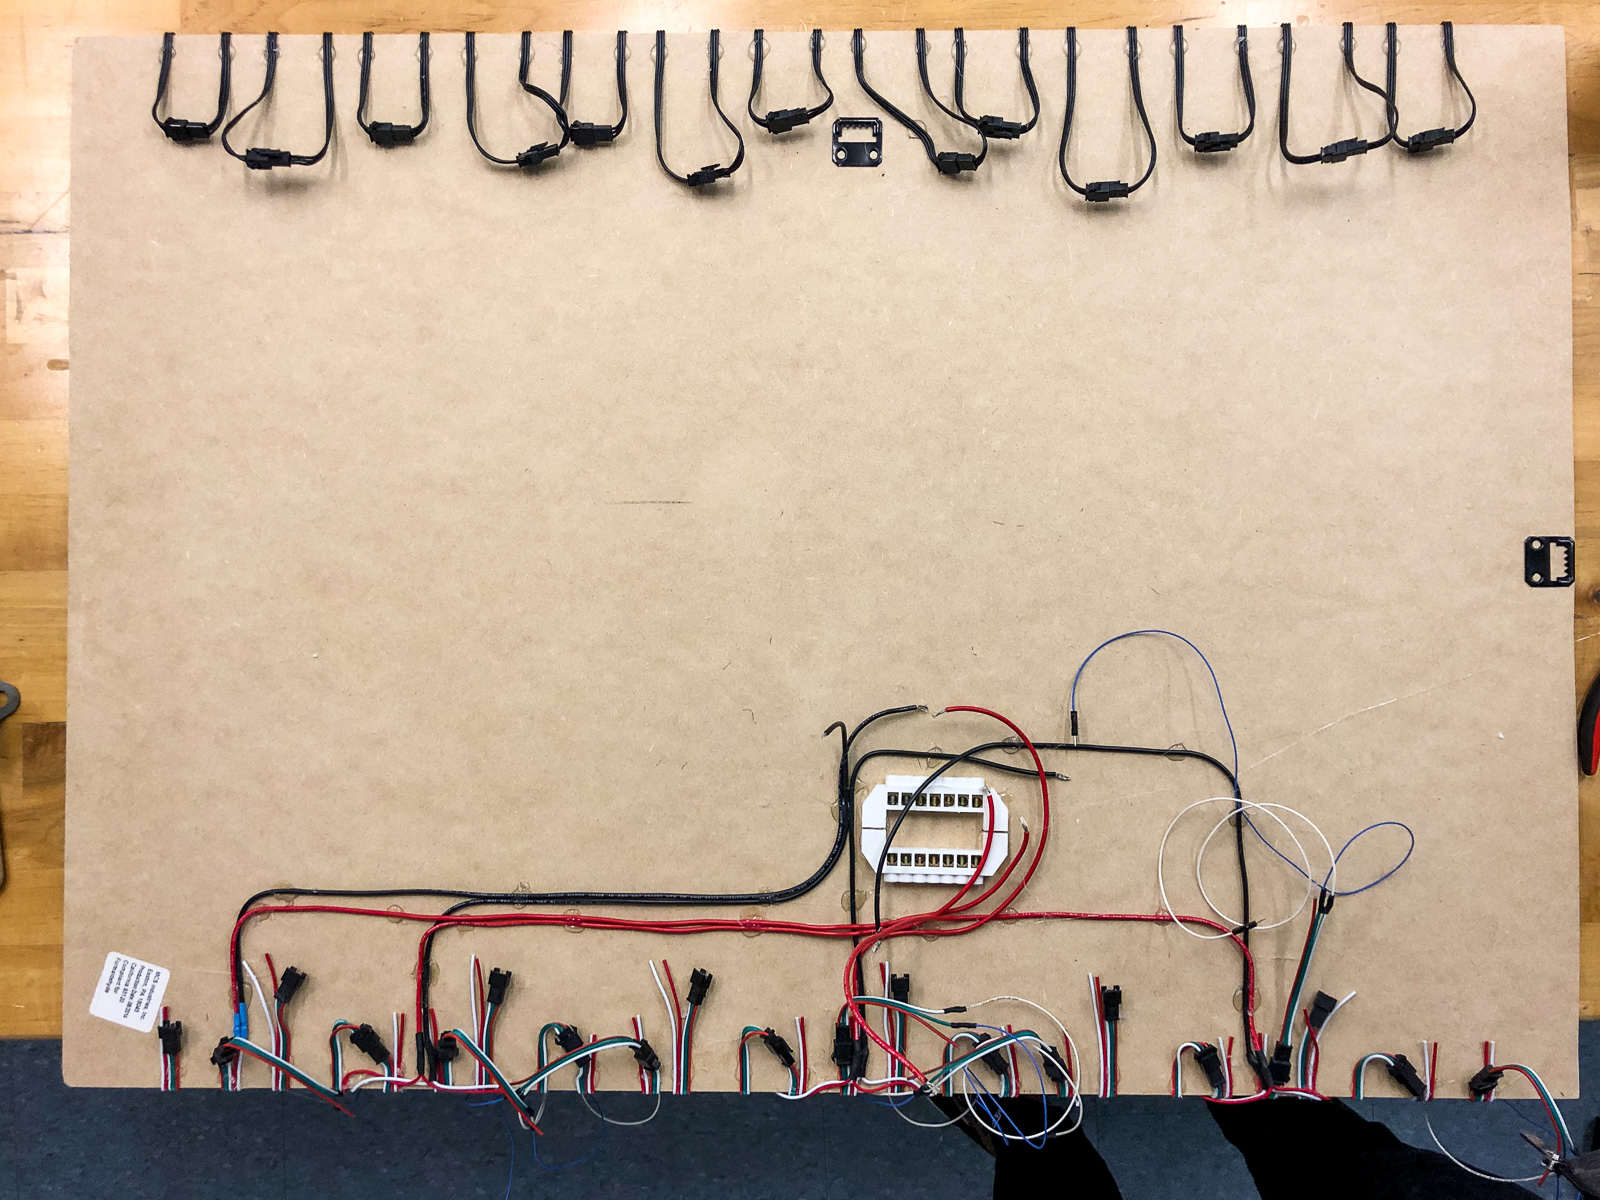
From there, I built out the data and power trees backwards from the tail of each set of strips. Where possible, I combined the power lines together to merge the 26 strips down to 3 sets of power mains, which routed into a terminal block mounted on the back of the board.
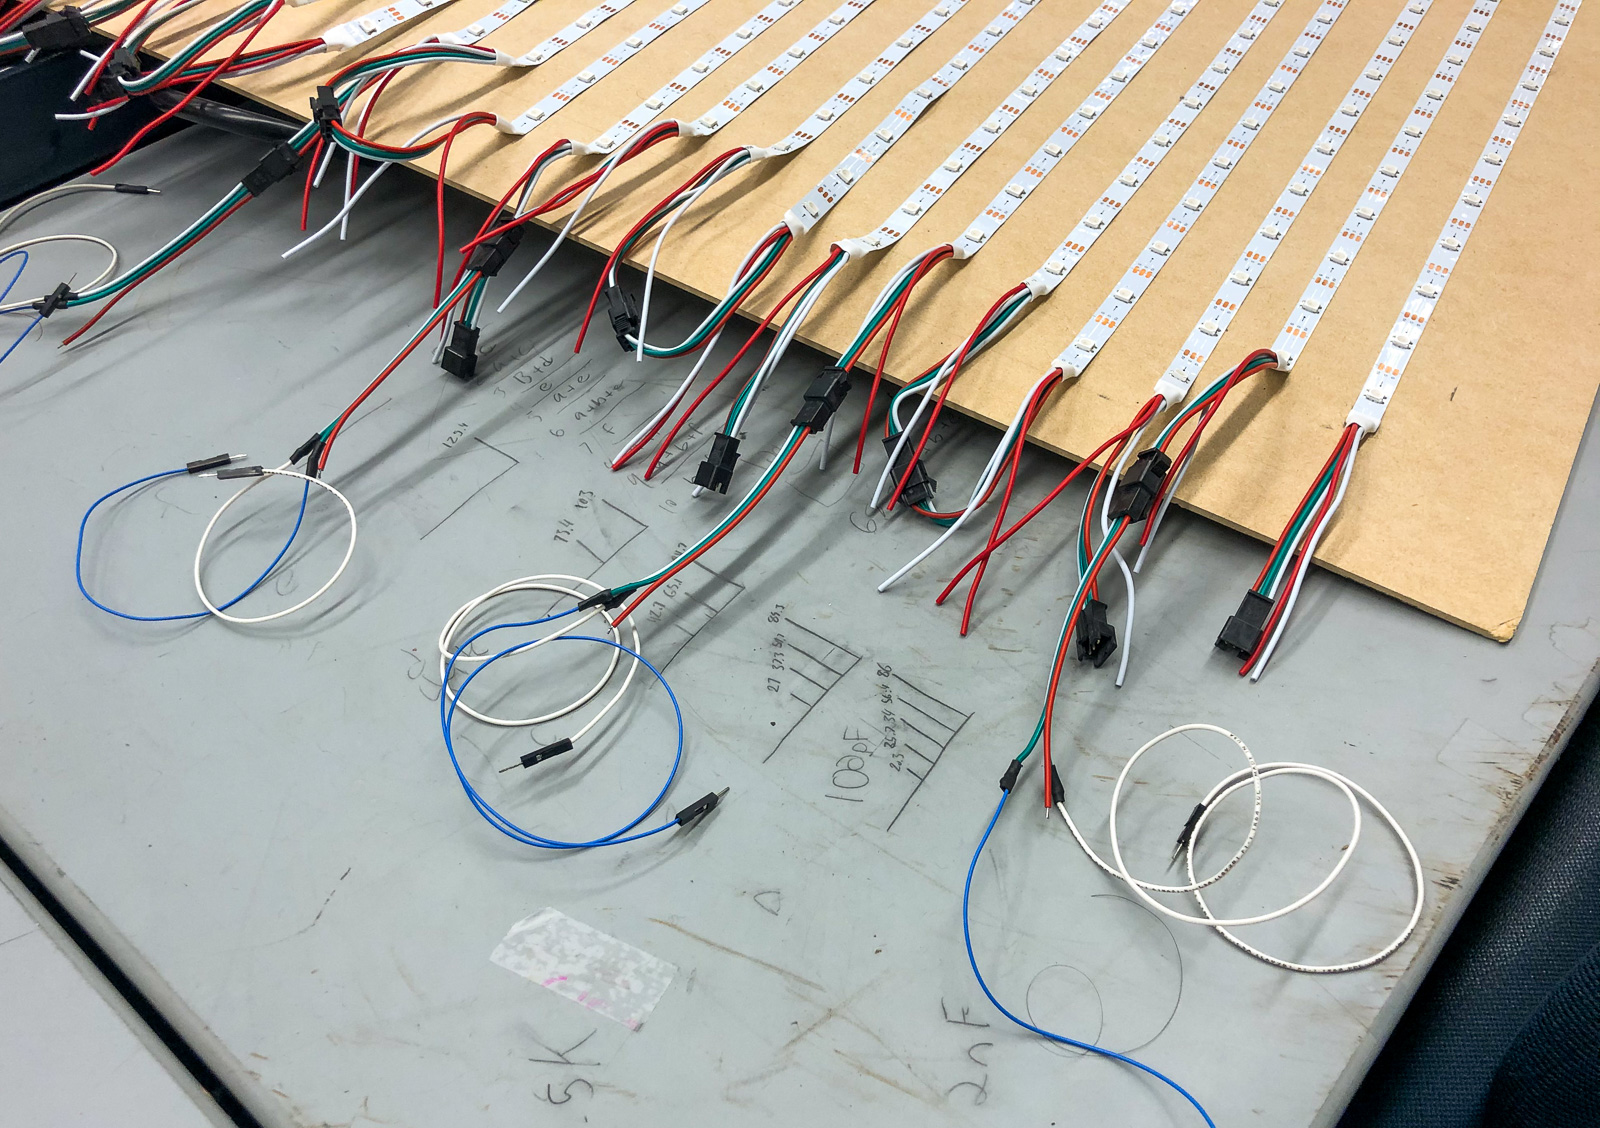
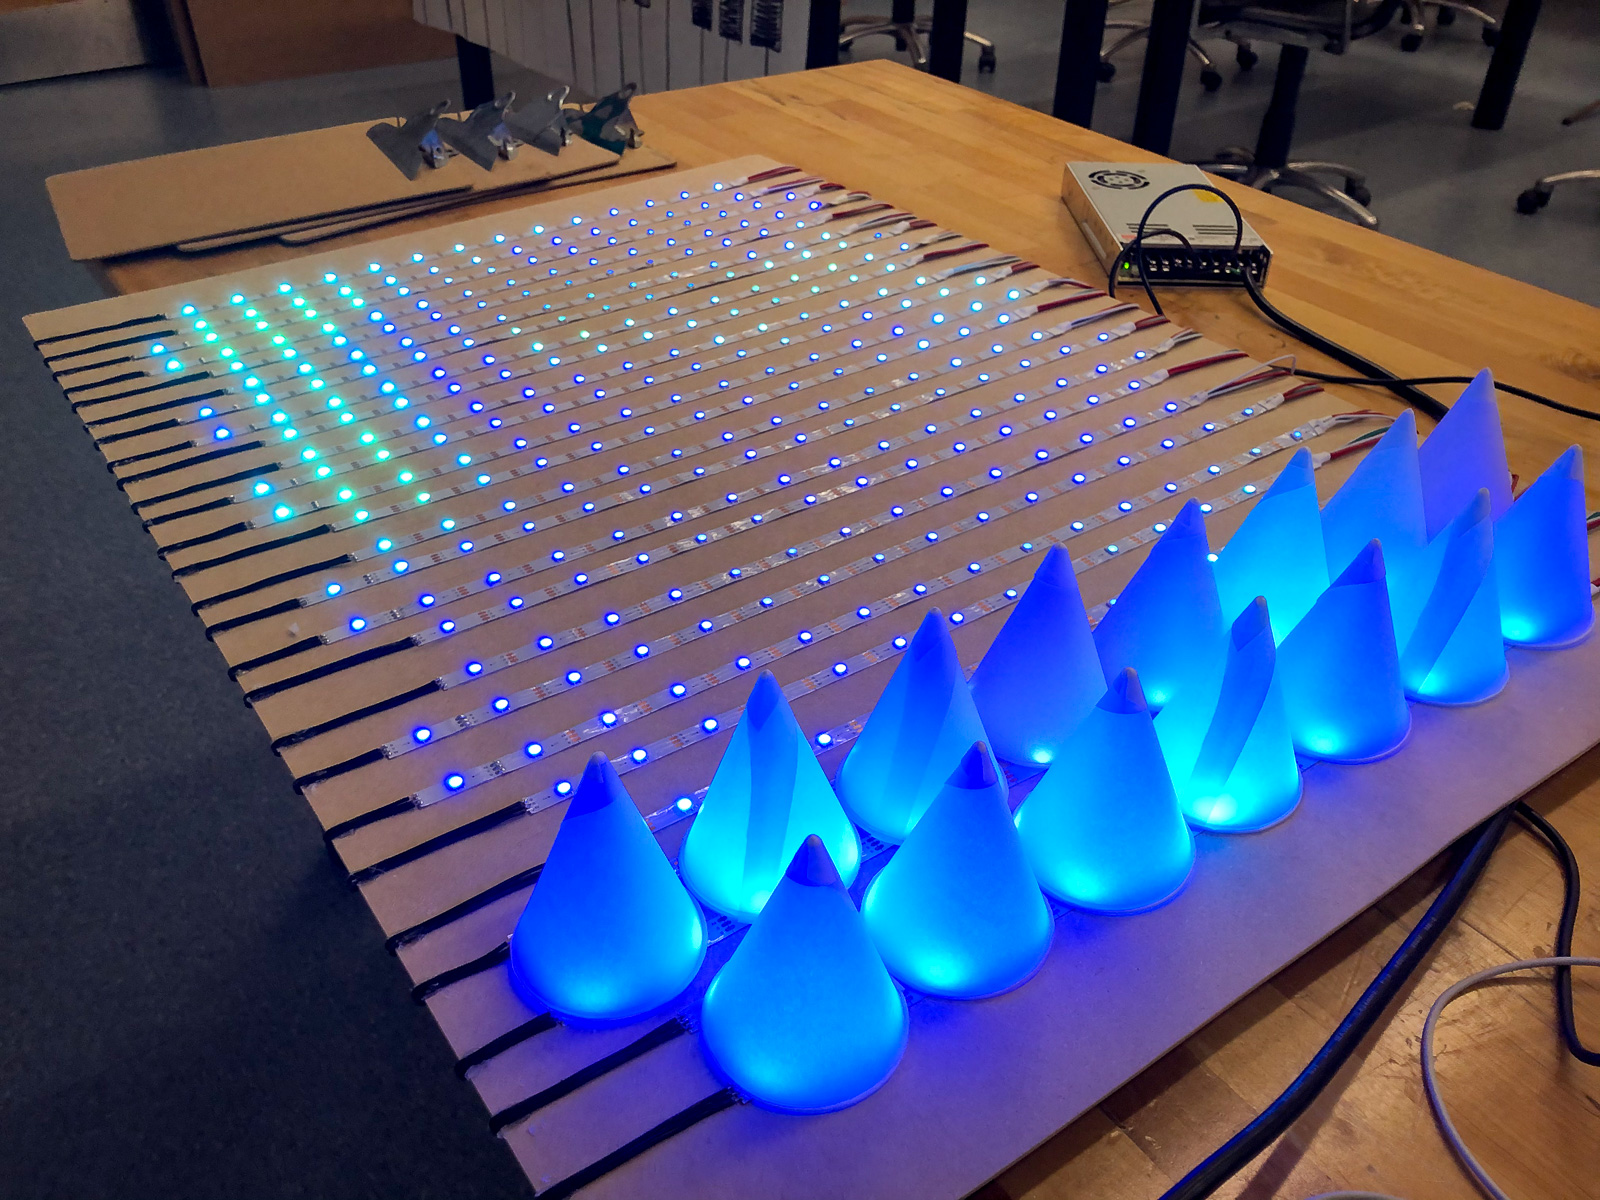
With the power and data trees complete, I mounted the terminal blocks and FadeCandy board and did some cable management to clean things up a bit.
With everything wired up, it was time to test the lights! To do so, I needed to map the outputs of the Fadecandy board to correspond to the physical arrangement of the LEDs on my board. This meant configuring the data outputs of the board itself as well as the visuals I was rendering — I’ll explain more about this later.
At full brightness, the matrix was blinding — 388 LEDs with an output of .2 watts each is not something to mess around with!
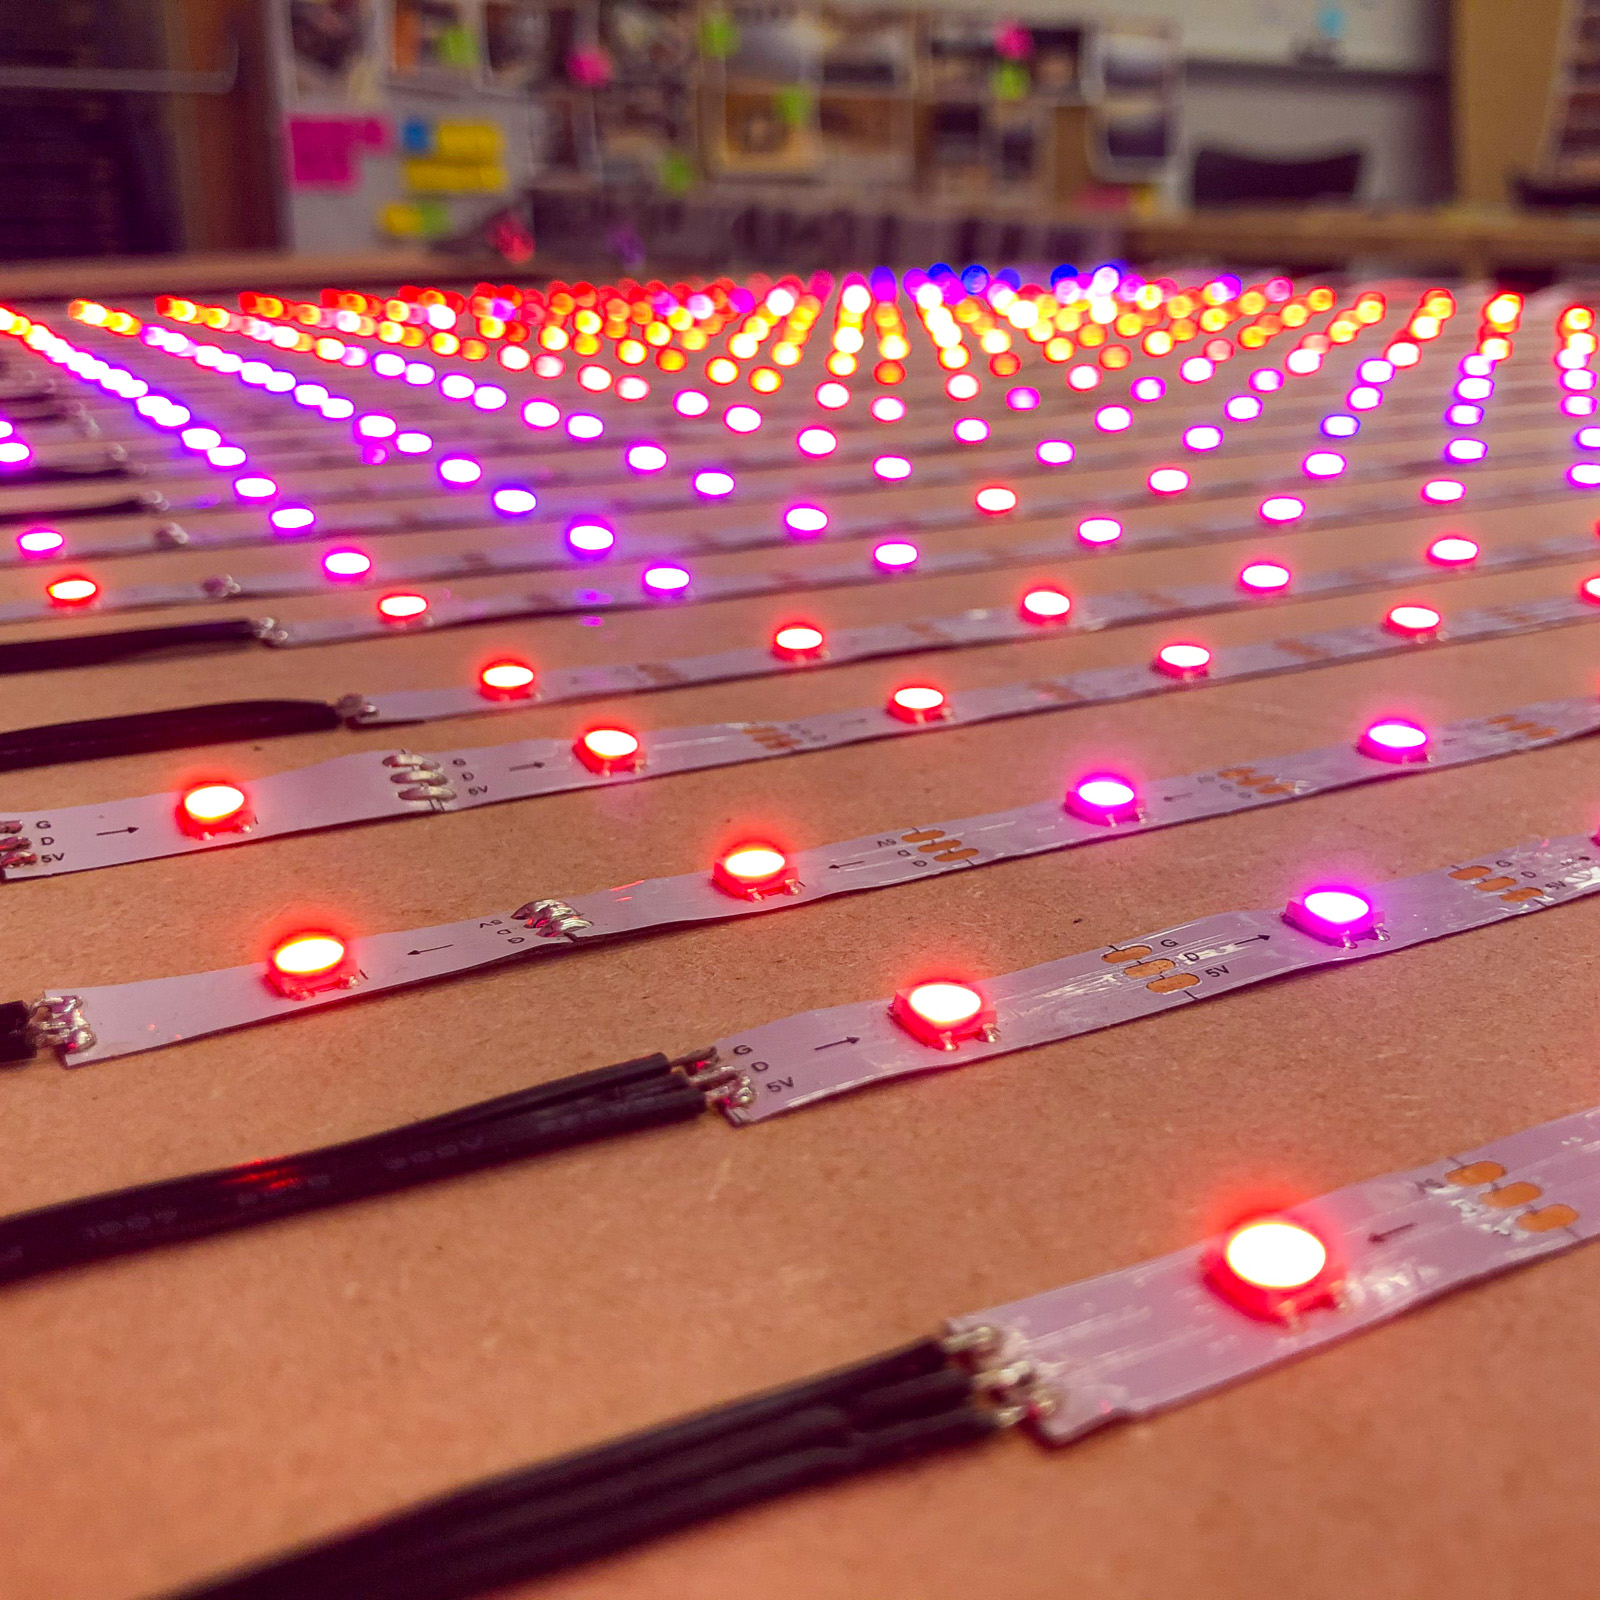
The final build step was attaching the cones themselves. Using a few drops of hot glue, I affixed each cone over its respective set of four NeoPixels. As I continued across, the piece began to take shape.
Plug, play, and stare
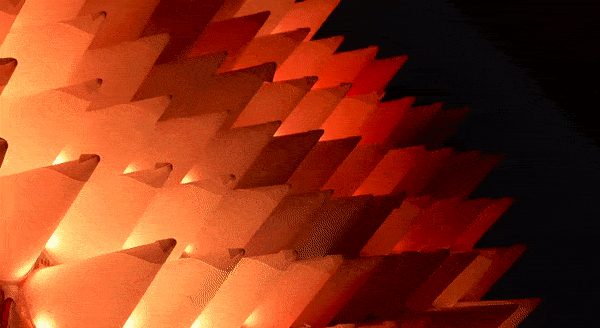
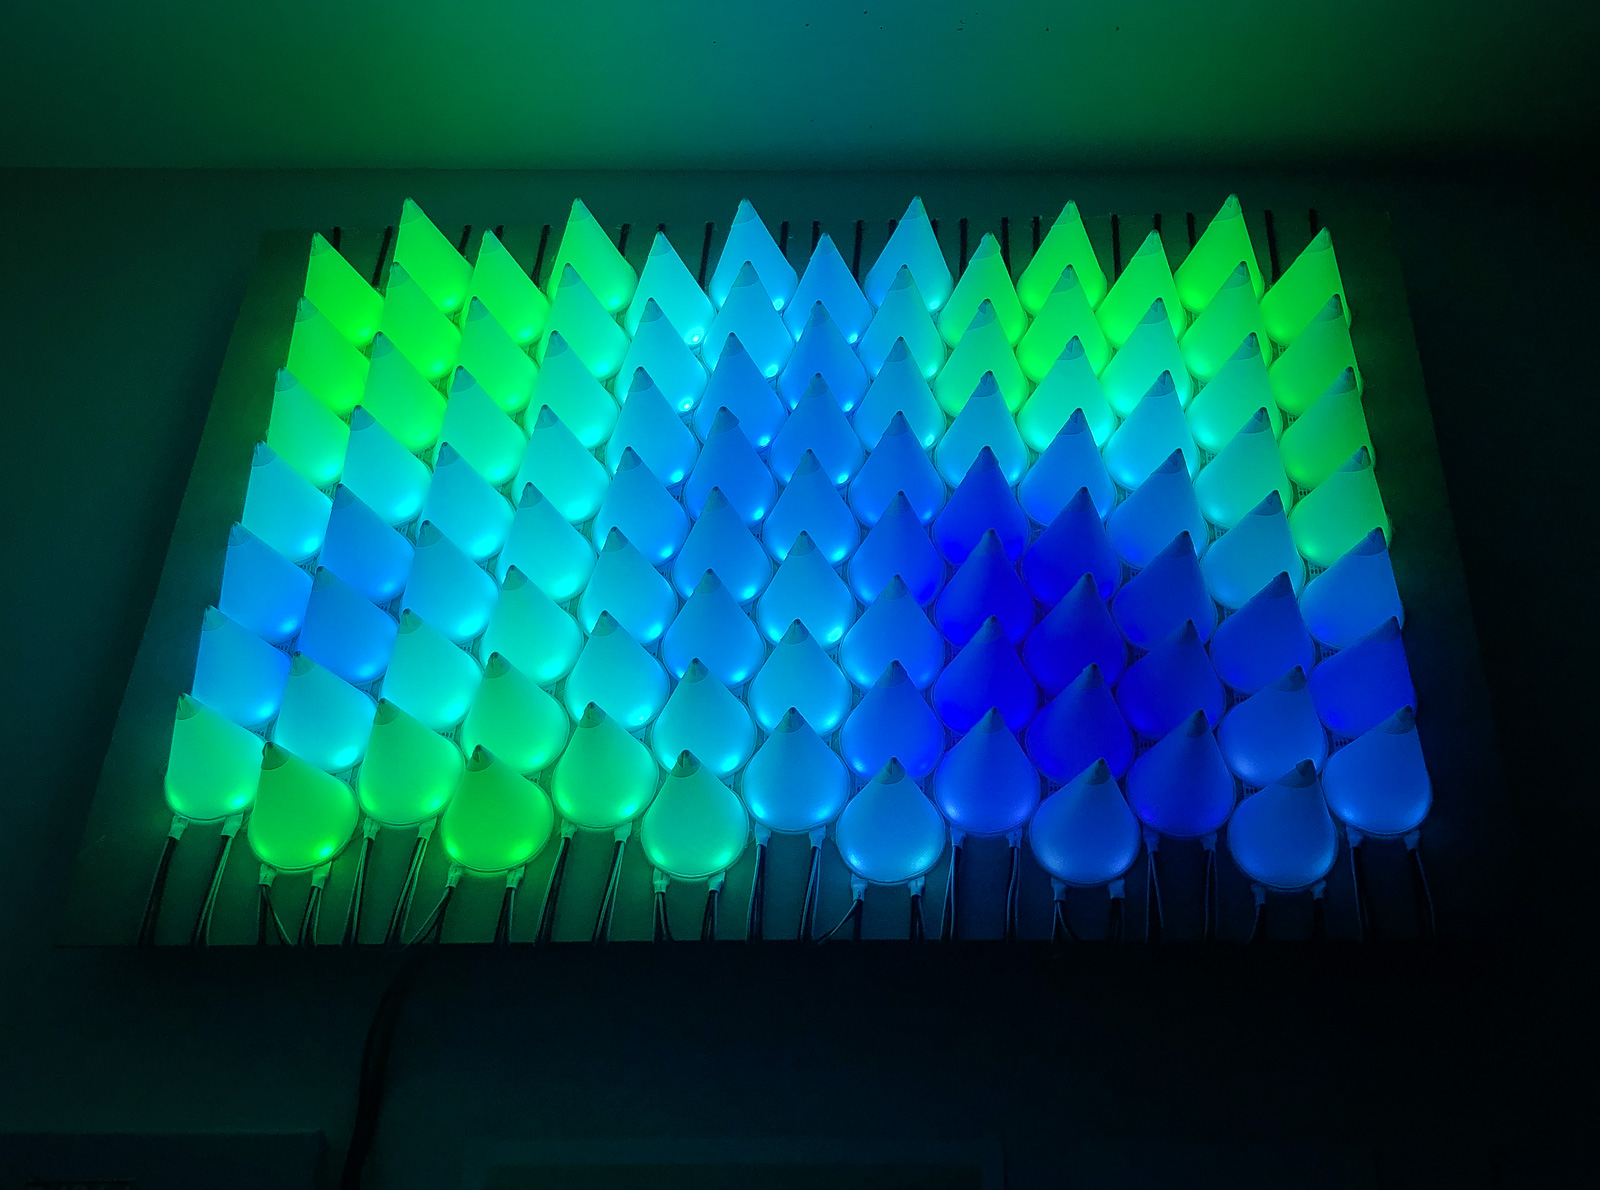
After writing some rudimentary code in Processing to display some colorful noise patterns, I hit run and watched the cones dance to life. In its finished form, the sculpture was like nothing I’d ever experienced. The cones blazed as the generated pattern morphed and evolved, reminiscent of flames or waving grass.
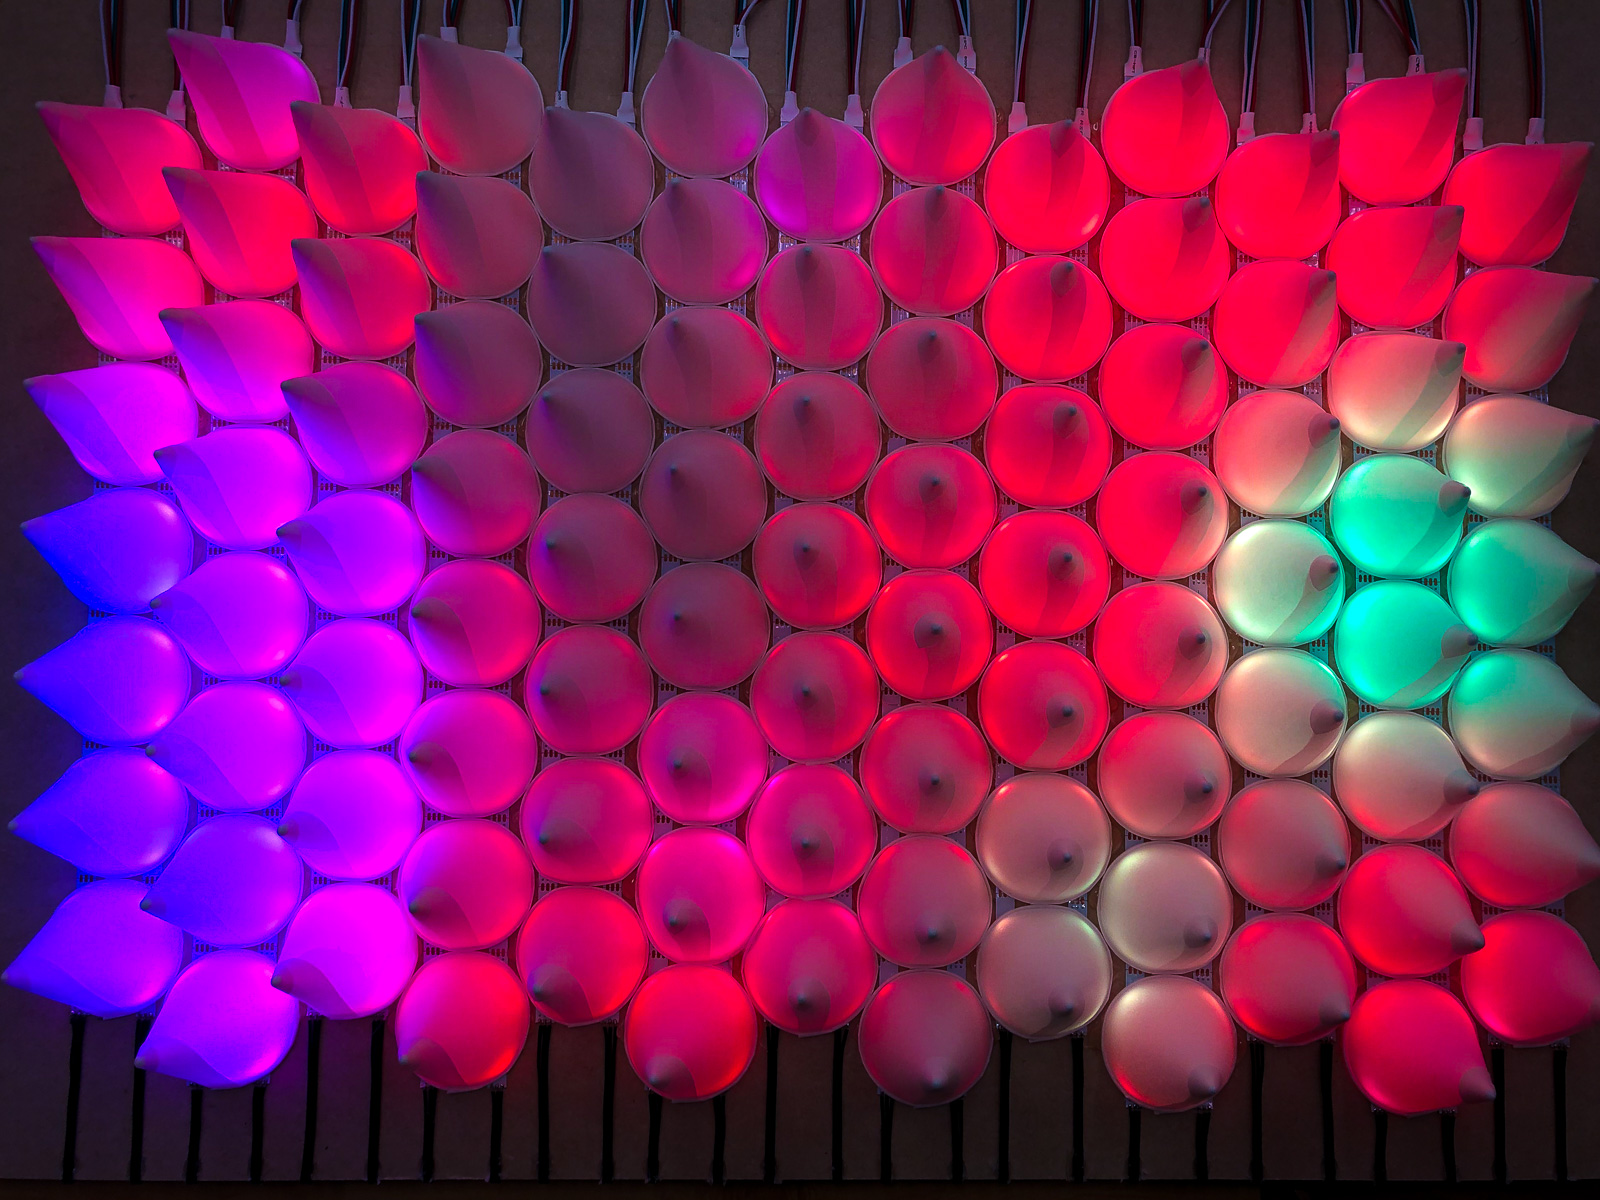
Here, the rig is mounted in my room at Olin, playing the obligatory role of cool LED dorm lighting. With this color palette, I imagine the cones as pine trees in between bodies of darker blue water. Perhaps they’re part of some sort of exotic bio-luminescent forest…

What’s next?
This project was a ton of fun, but I see what I built as only a first foray into an exploration of illuminated sculpture and interactive lighting experiences. I’d love to scale this project up to cover an entire wall or ceiling, or do away with the constraint of mounting on flat planes all together. I’ve only scratched the surface, as there are many artificial and organic objects I think could look wild with LEDs behind them, not to mention the potential for real-time interaction with a live audience. I just hope my roommate finds some other cool objects to bring back in bulk!