LED Build: Jenny Chow
· Electronics · 3D & CAD
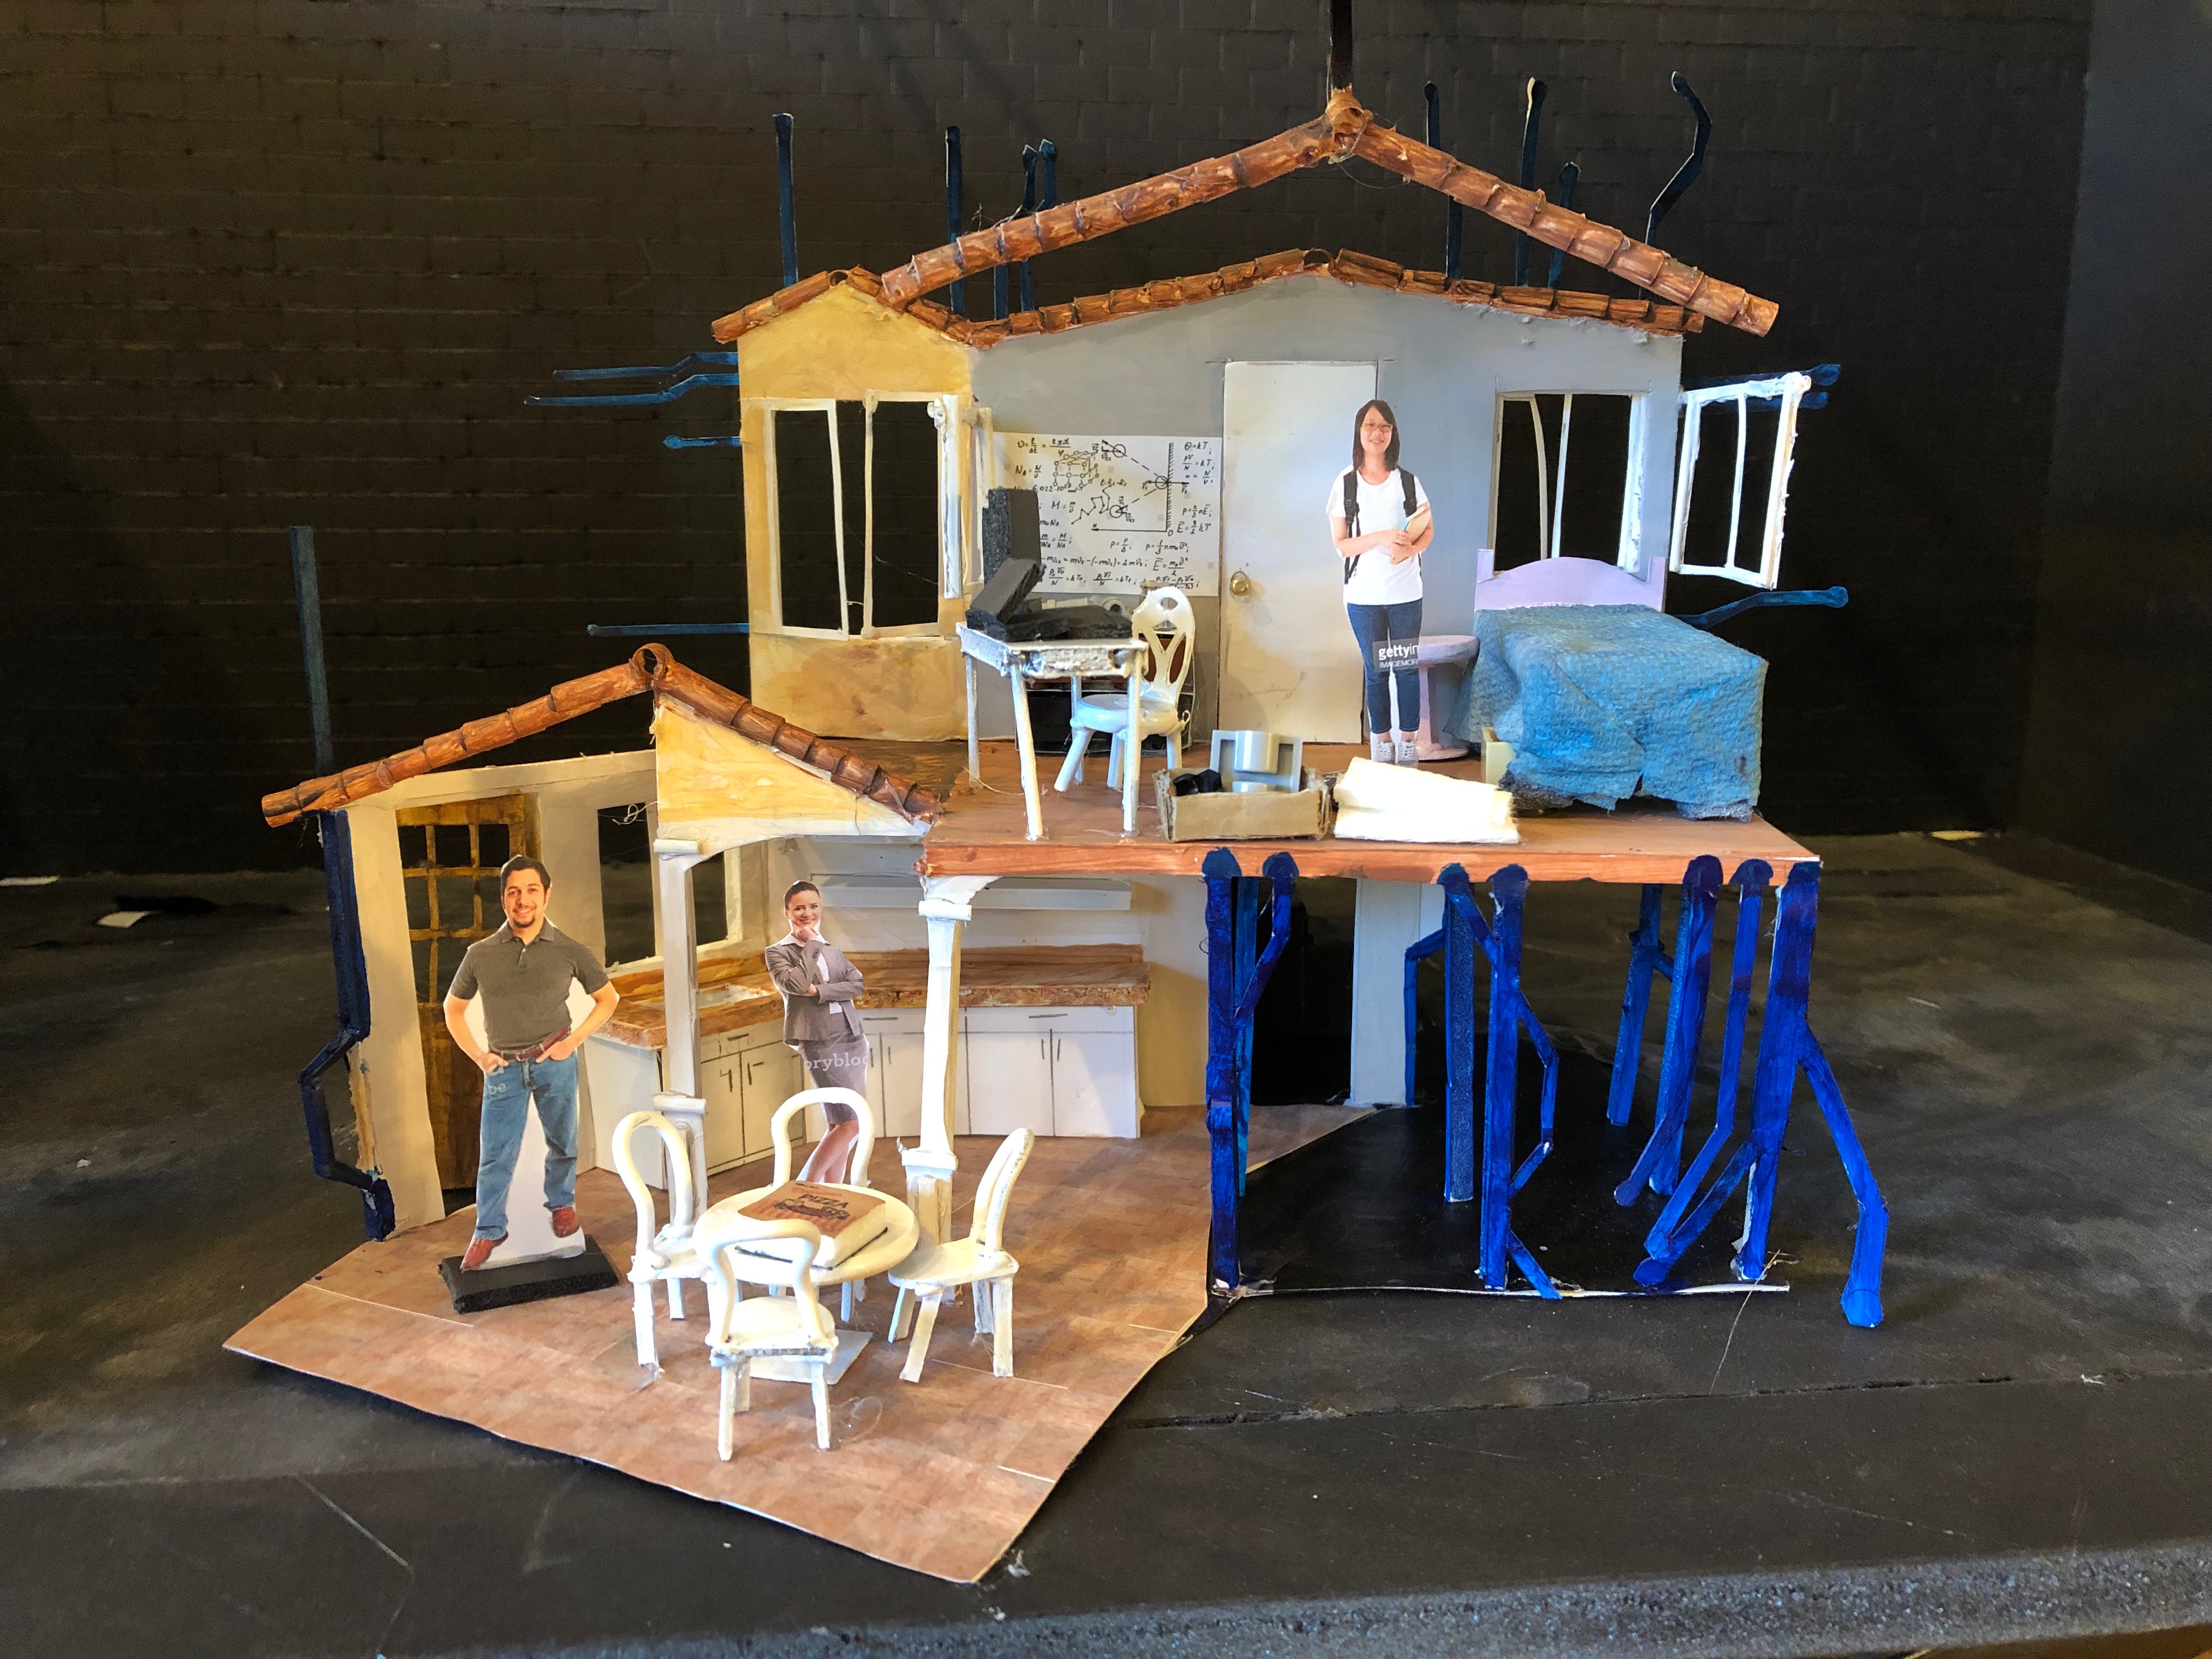
During my first semester at Olin College, I had the opportunity to design and fabricate a custom lighting rig for a production of The Intelligent Design of Jenny Chow at Babson College.
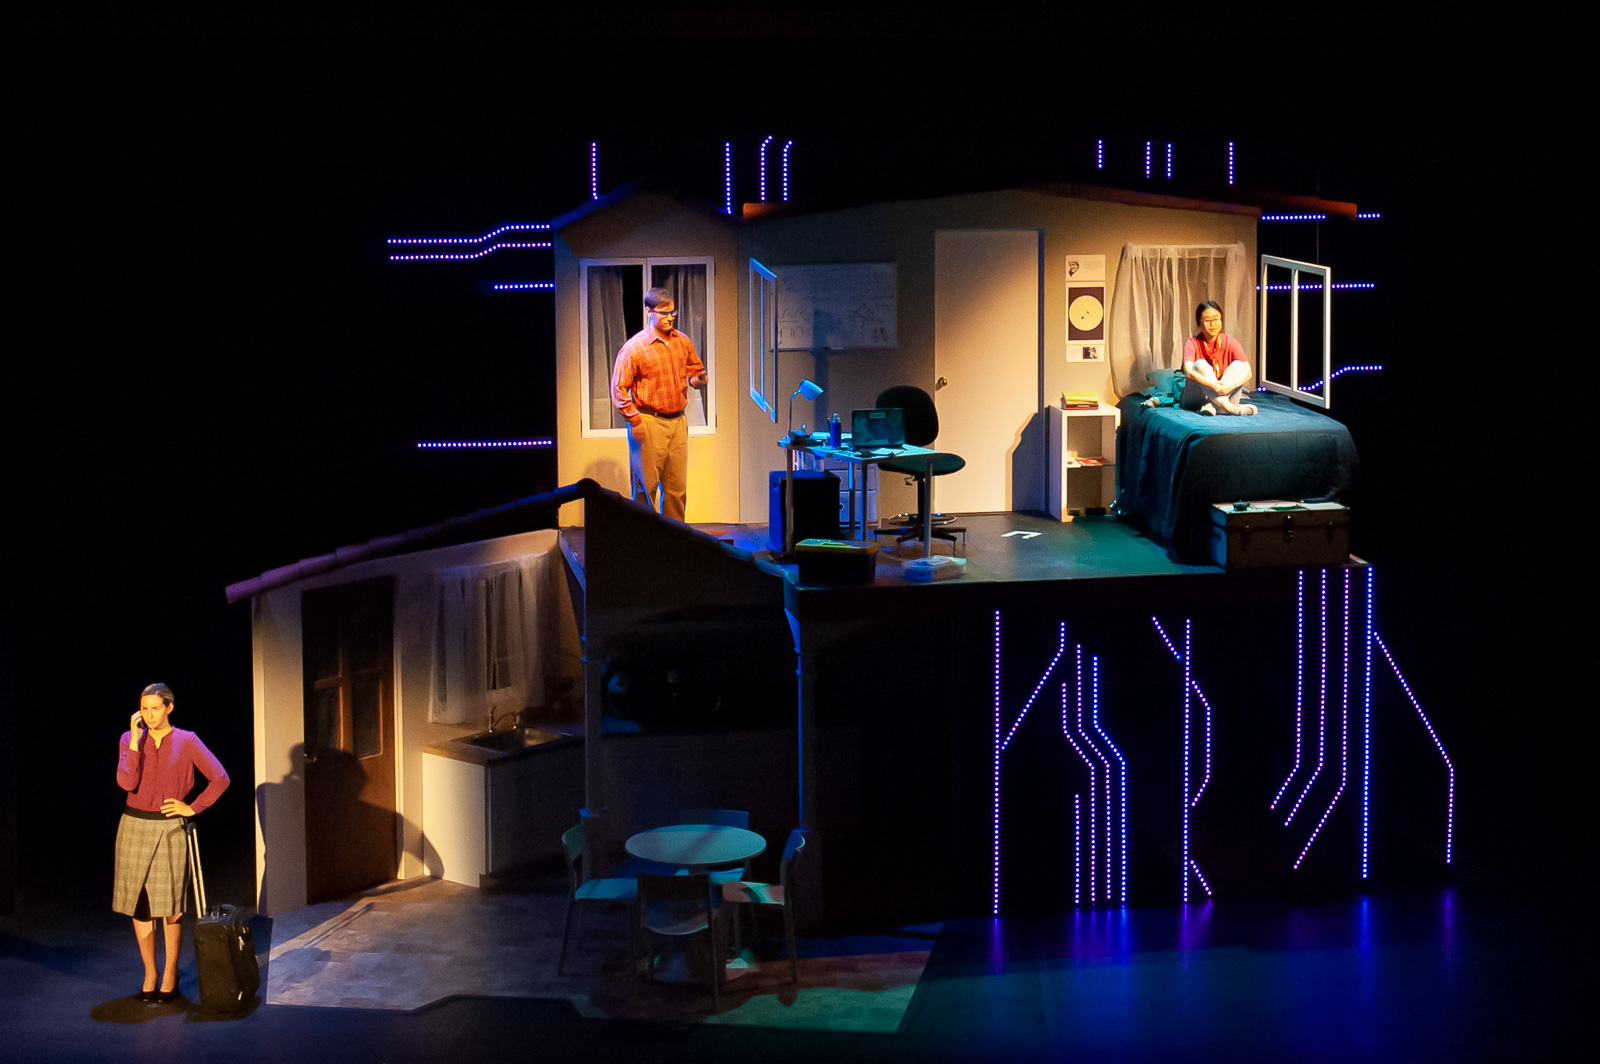
I won’t spoil the show, but essentially the main character (Jenny) is a tech savvy teenager from California who wants to reconnect with her birth mother in China, whom she’s not seen since she was put up for adoption. She sets out to create a robotic version of herself to travel and meet her birth mother, and in doing so enlists the help of some interesting characters via the internet. From her bedroom hideaway, she connects to these characters via the internet, hence the illuminated circuits sprawling out from her bedroom.
Working closely with the show’s lighting designer and technical director, I developed and implemented a custom lighting rig to bring these circuits to life. They proved to be a key element of the show, giving the otherwise static set a sense of techy, LED-powered visual motion.
Build Process
This project gave me the fantastic opportunity to collaborate with professionals in the field while delivering a novel piece of tech to the table. I’d worked with numerous theatre professionals before, but rarely was I given the chance to create a scratch-built solution that proved so central to the show. Read on for more technical details!
Initial Sketches
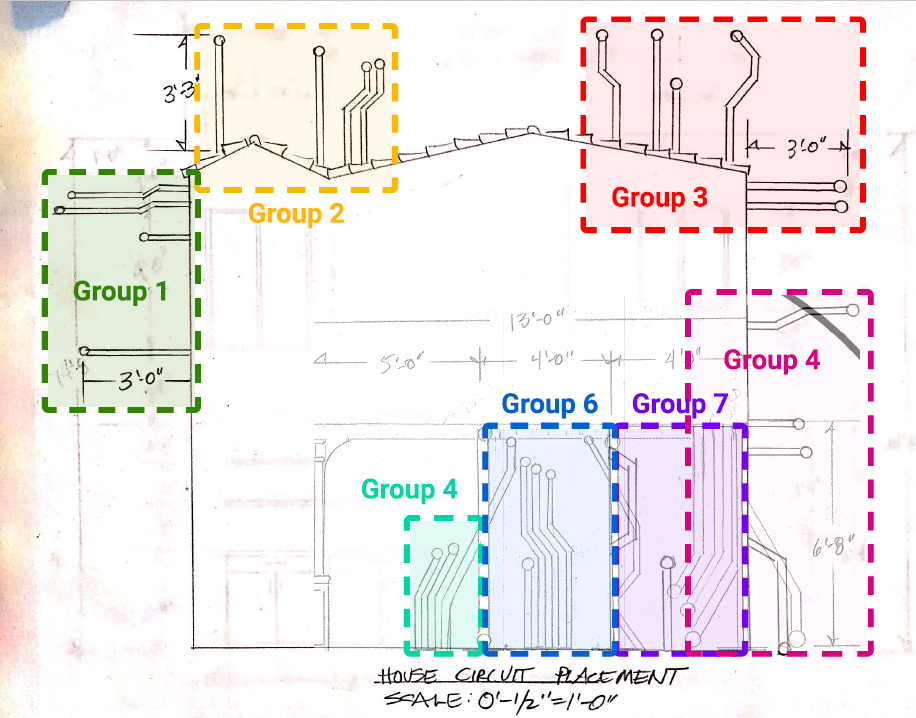
I worked with the sketches from the scenic designer to spec out what the circuits might look like. The set was being fabricated off-site, so I knew anything I created would have to integrate with the existing set with little to no modification.
Component Overview
It was crucial that we could show some sense of motion and excitement via the circuits, so we opted for individual control of each circuit trace via analog LED strips. This let us do a bunch of cool animations without taking up too many channels on our lighting board, or requiring a separate system to drive a pixel mapped setup.
I specced out the following for under $400:
- RGB LED strips, to make all the pretty colors
- DMX Decoders, to convert control signals from the lighting console into power for the strips
- Power Supply, to get electrons where they need to be
- Wiring & Power Management, to safely deliver power to each strip.
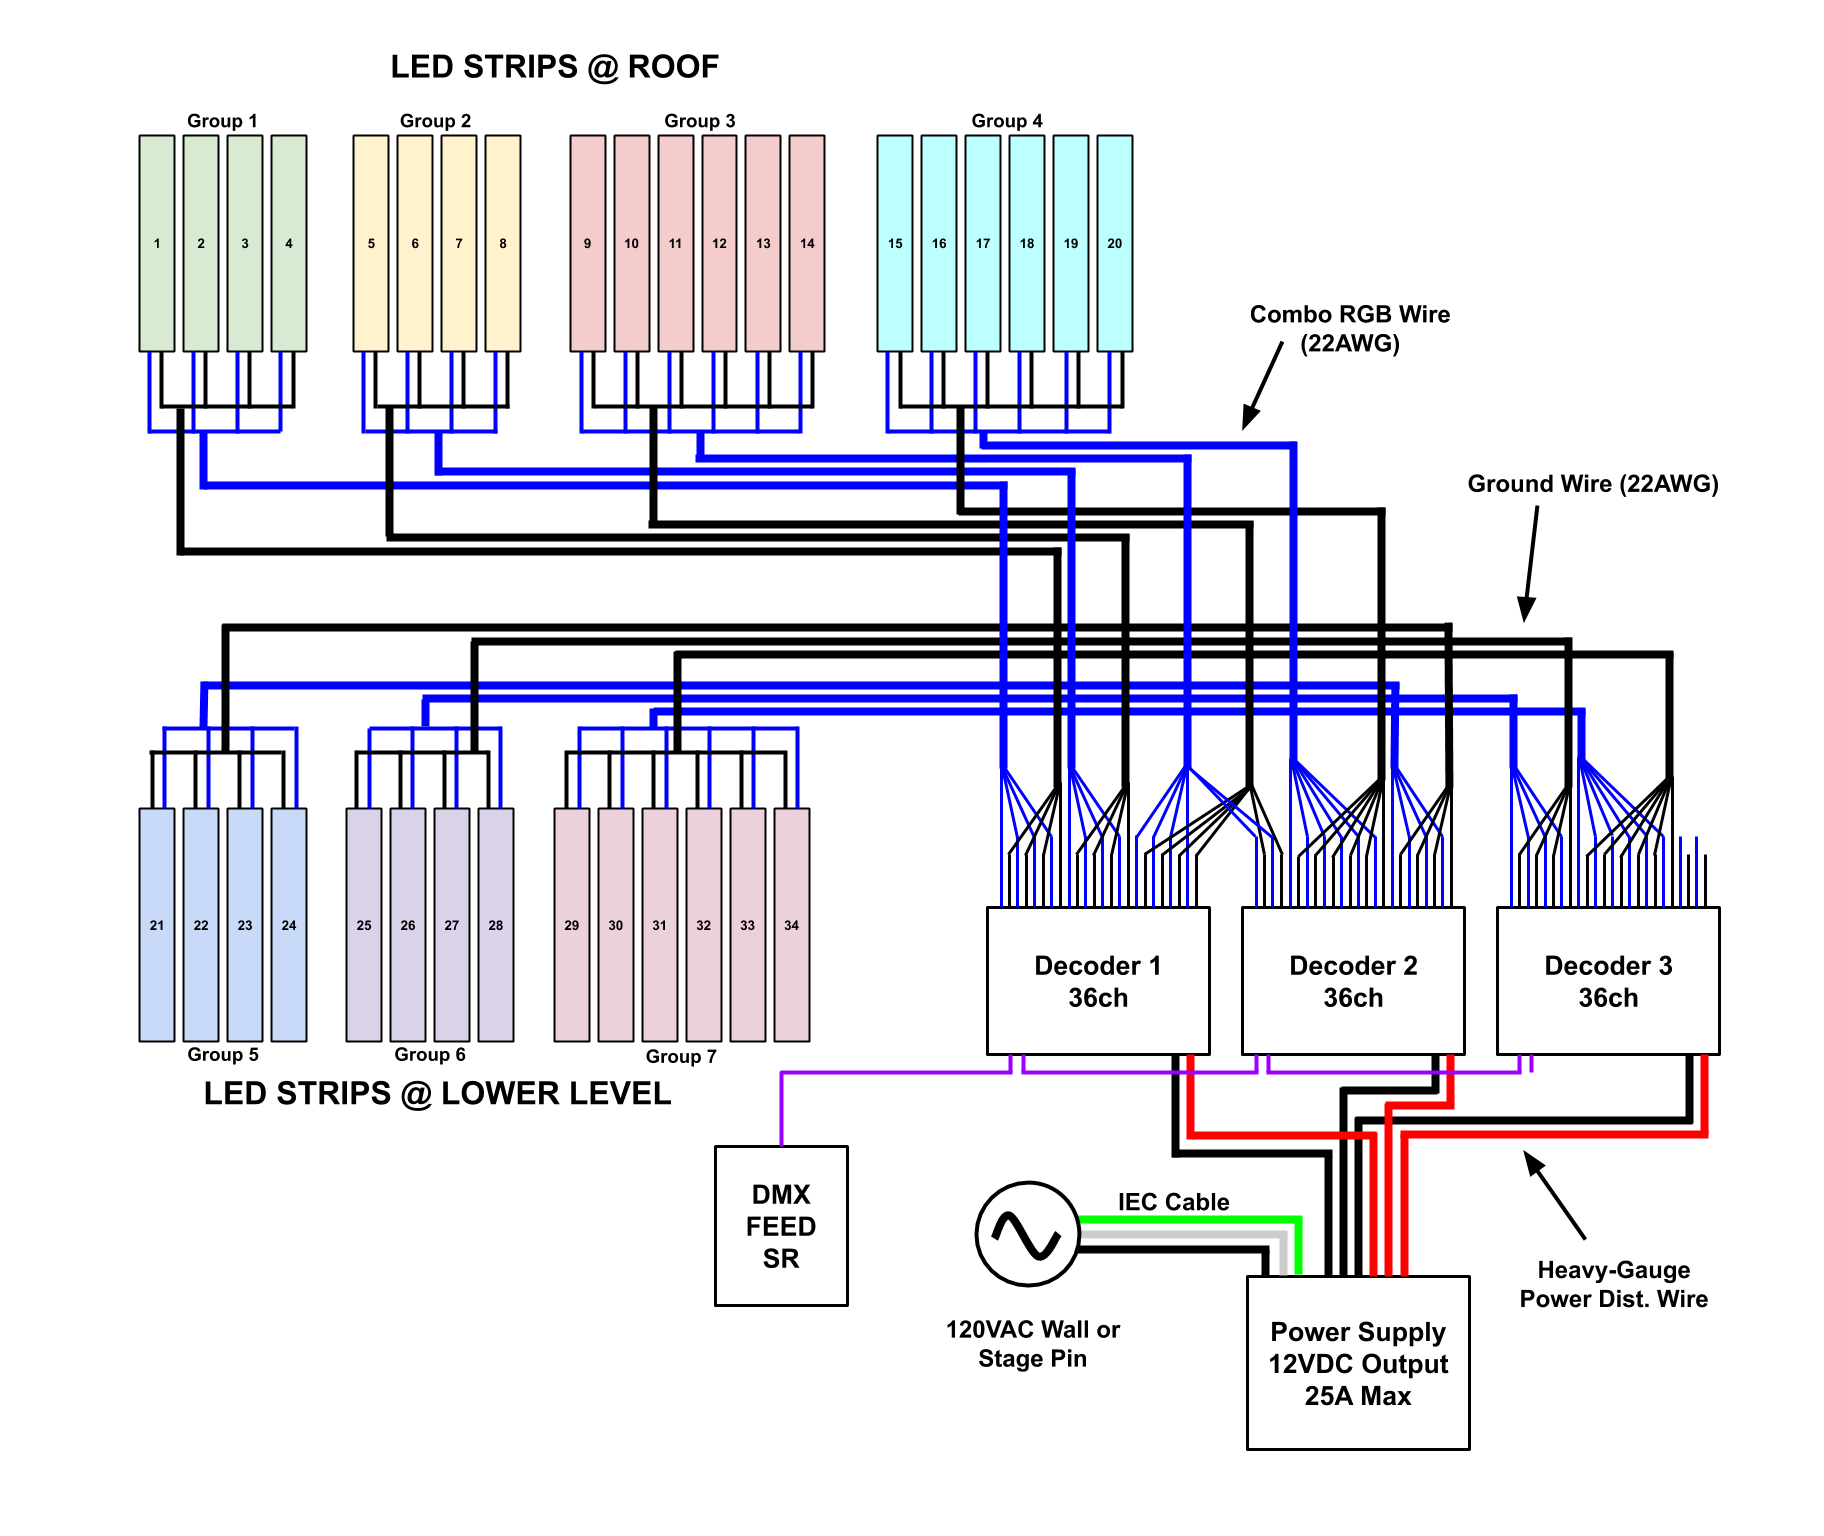
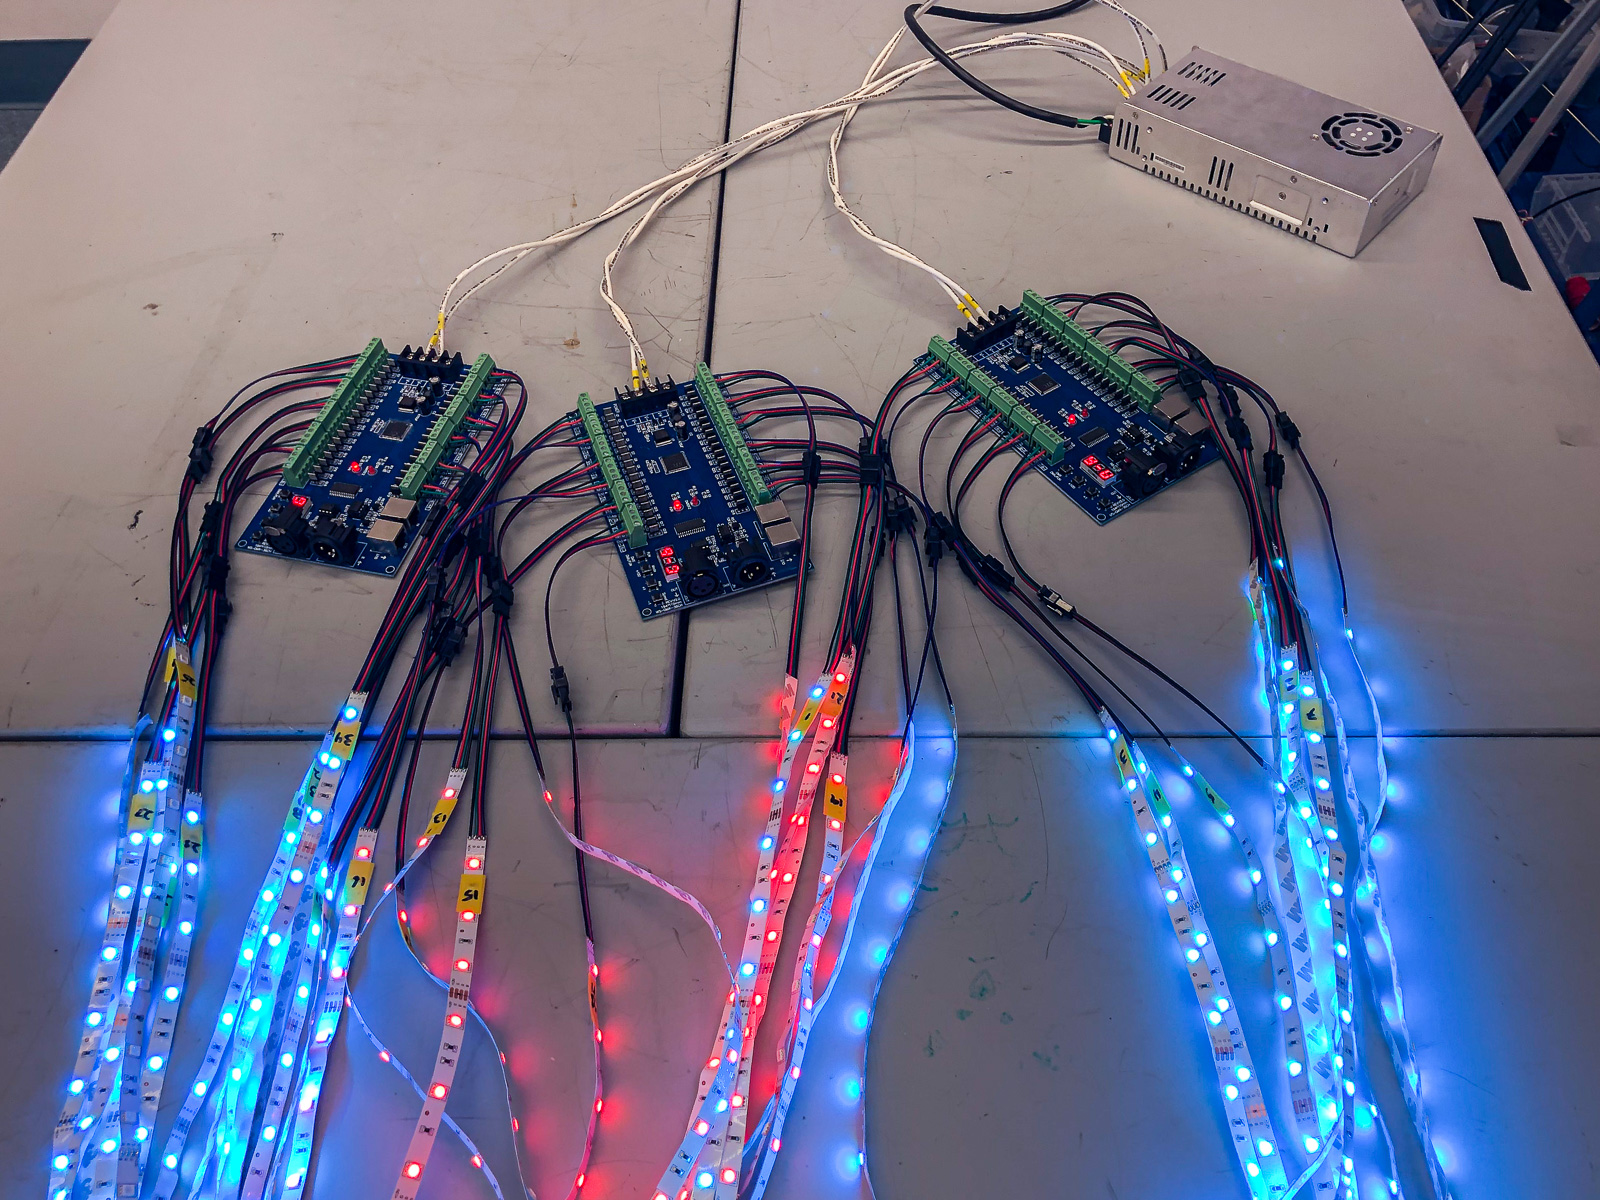
The power / data topology is set up like a tree - a single power source splits off to the three decoders, which interpret a DMX signal and then output power for each strip of LEDs.
These decoders are connected to each circuit individually, with 12 LED strips (36 channels total for R, G and B) per decoder. When the rig was installed, the set was still under construction, so I designed this setup for easy disconnect
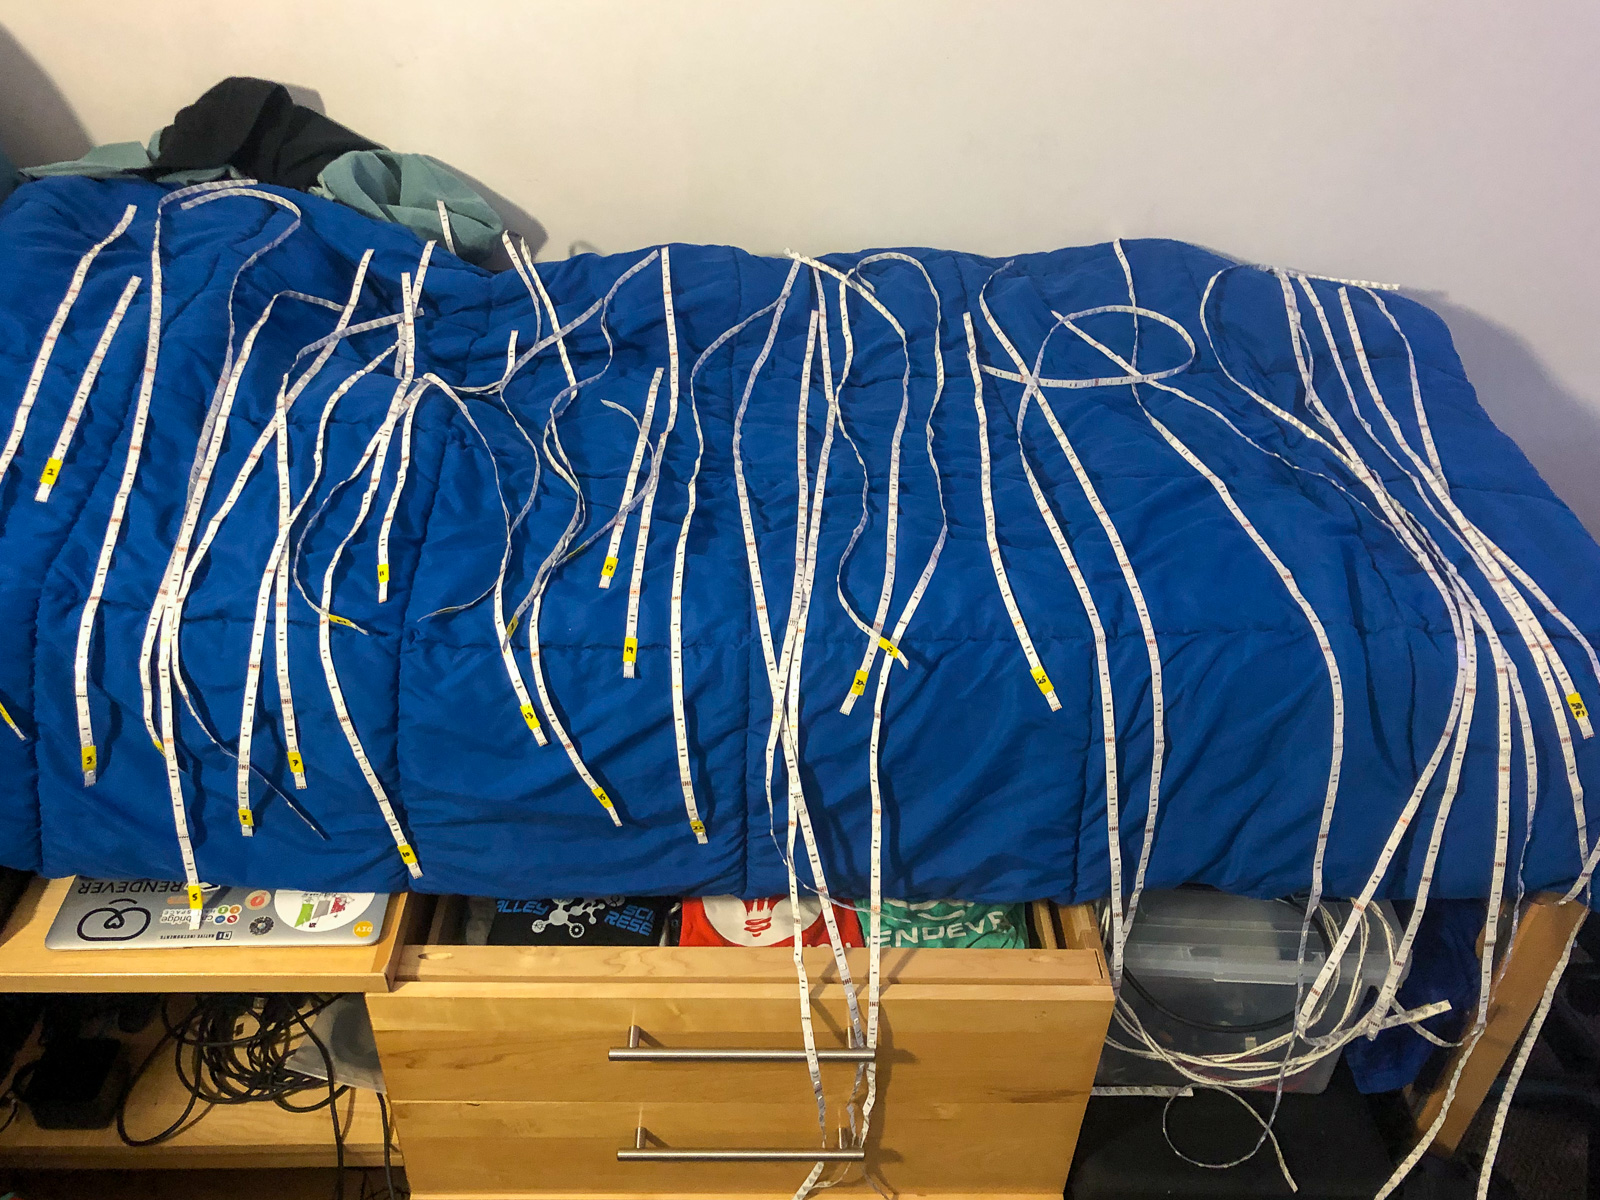
Assembly
Often times it’s easy to marvel at the end result of a production, but the hours of manual labor cutting, soldering, and testing LED strips and wiring gave me a real sense of the DIY attitude. It was refreshing to be working with low-cost components that were as important to the show as the lighting and audio equipment worth thousands of dollars.
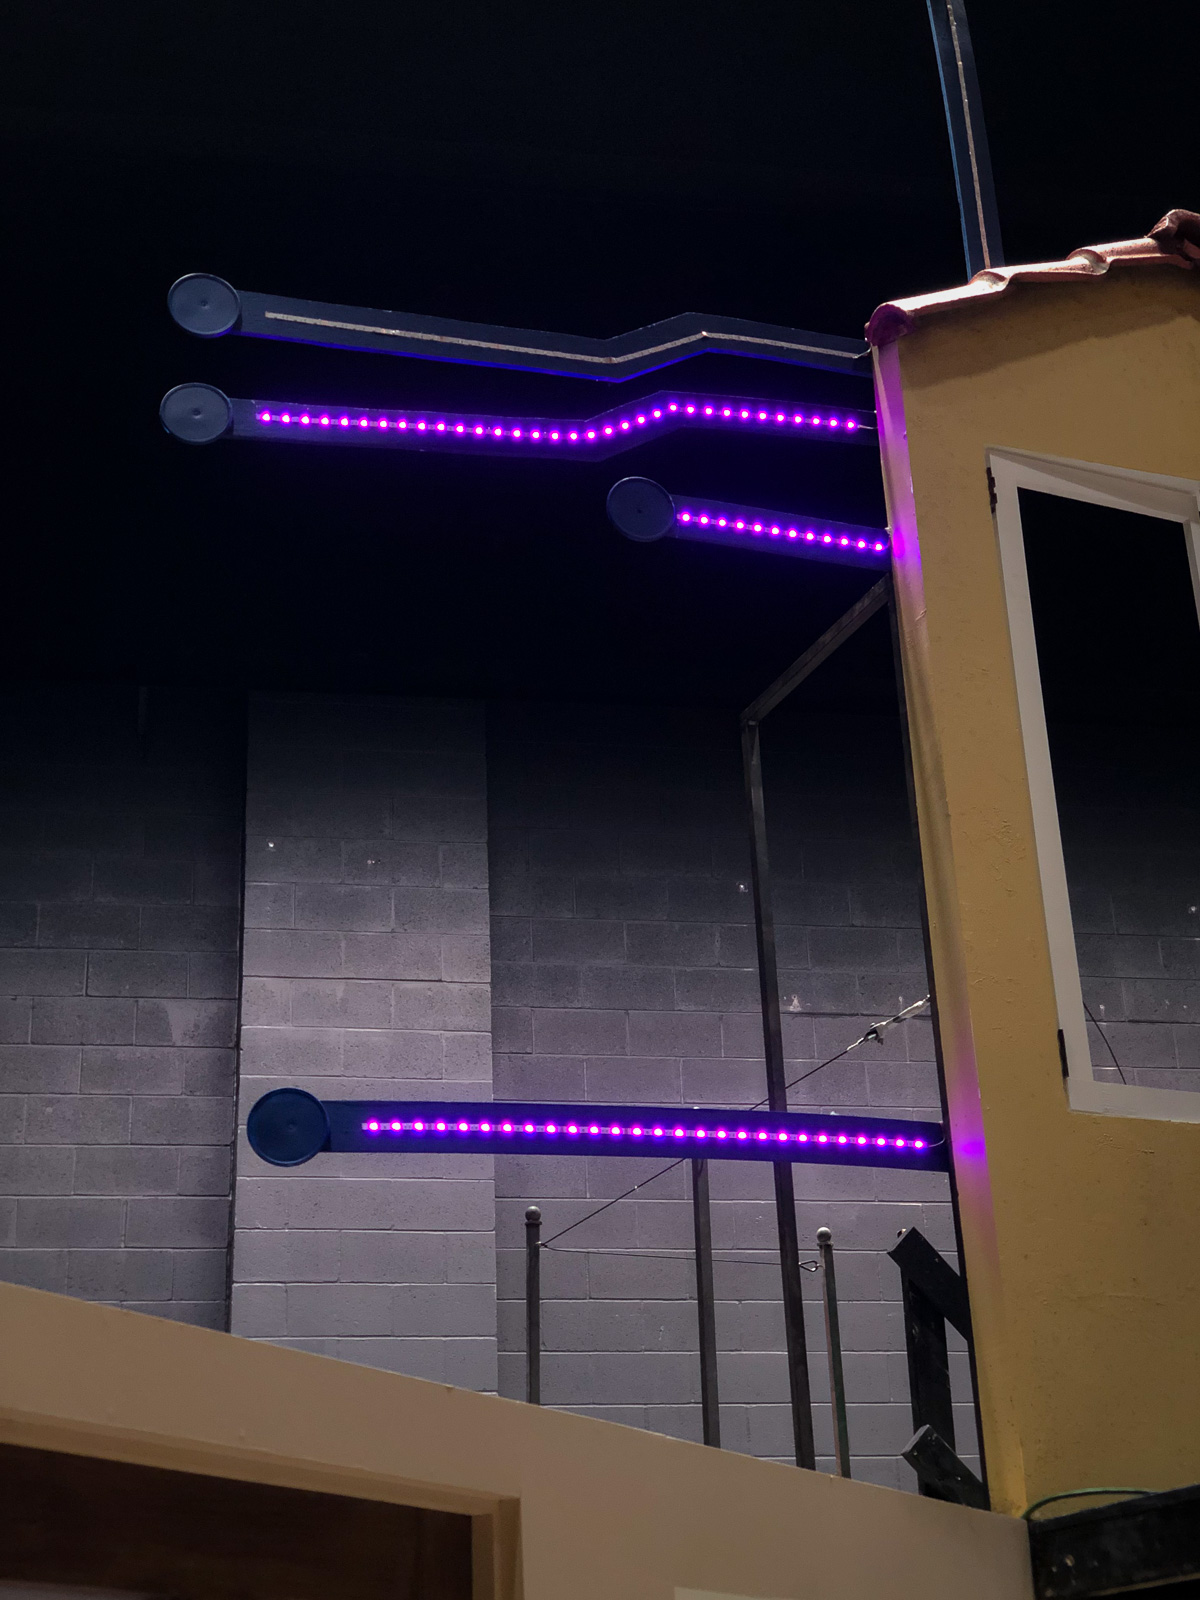
Installation
Because the led strips were being mounted upon wood, we used hot glue to affix them rather than the sticky back tape they come with. Once mounted, we ran the cables backwards from the lights to the DMX decoders. After some basic cable management, we were ready to test!
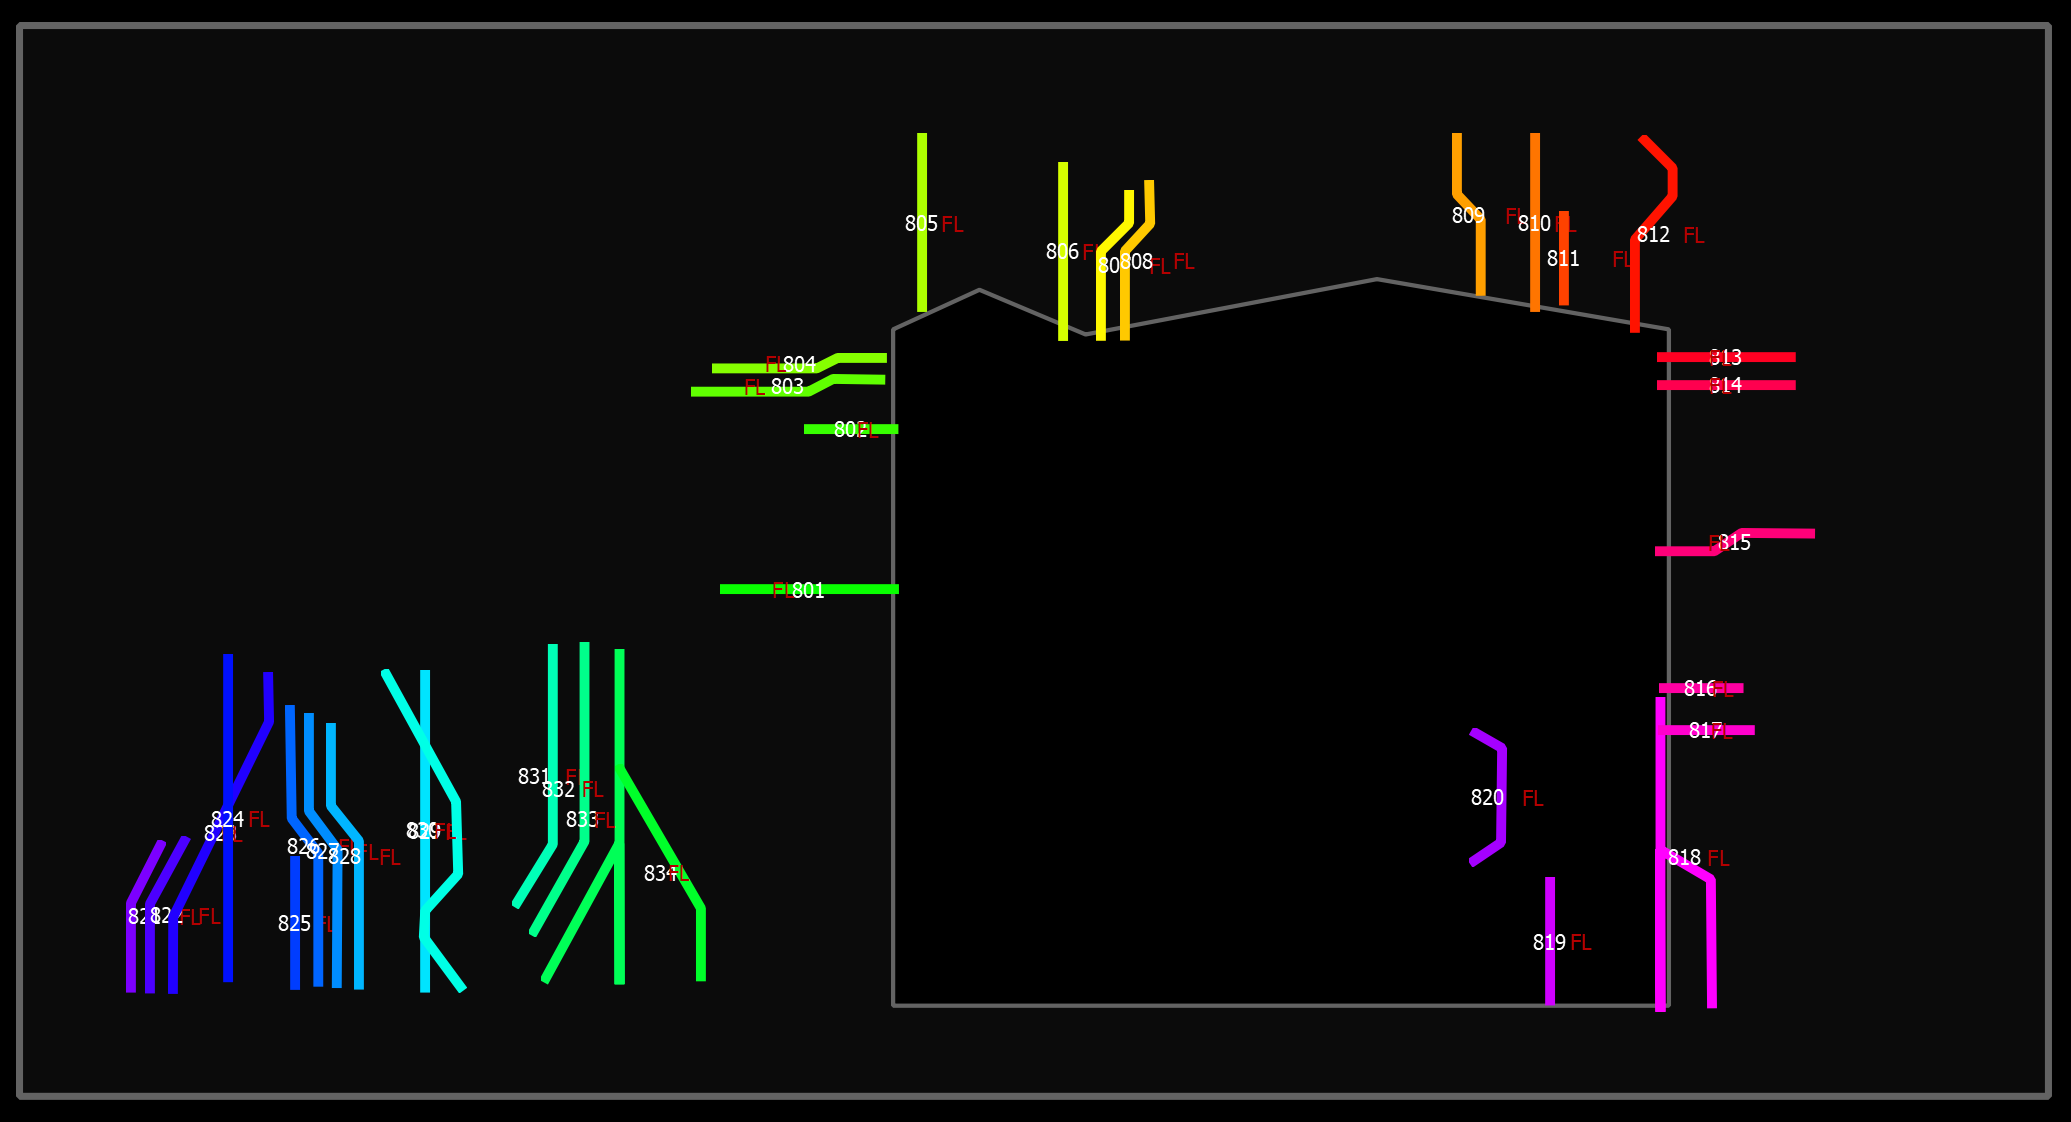
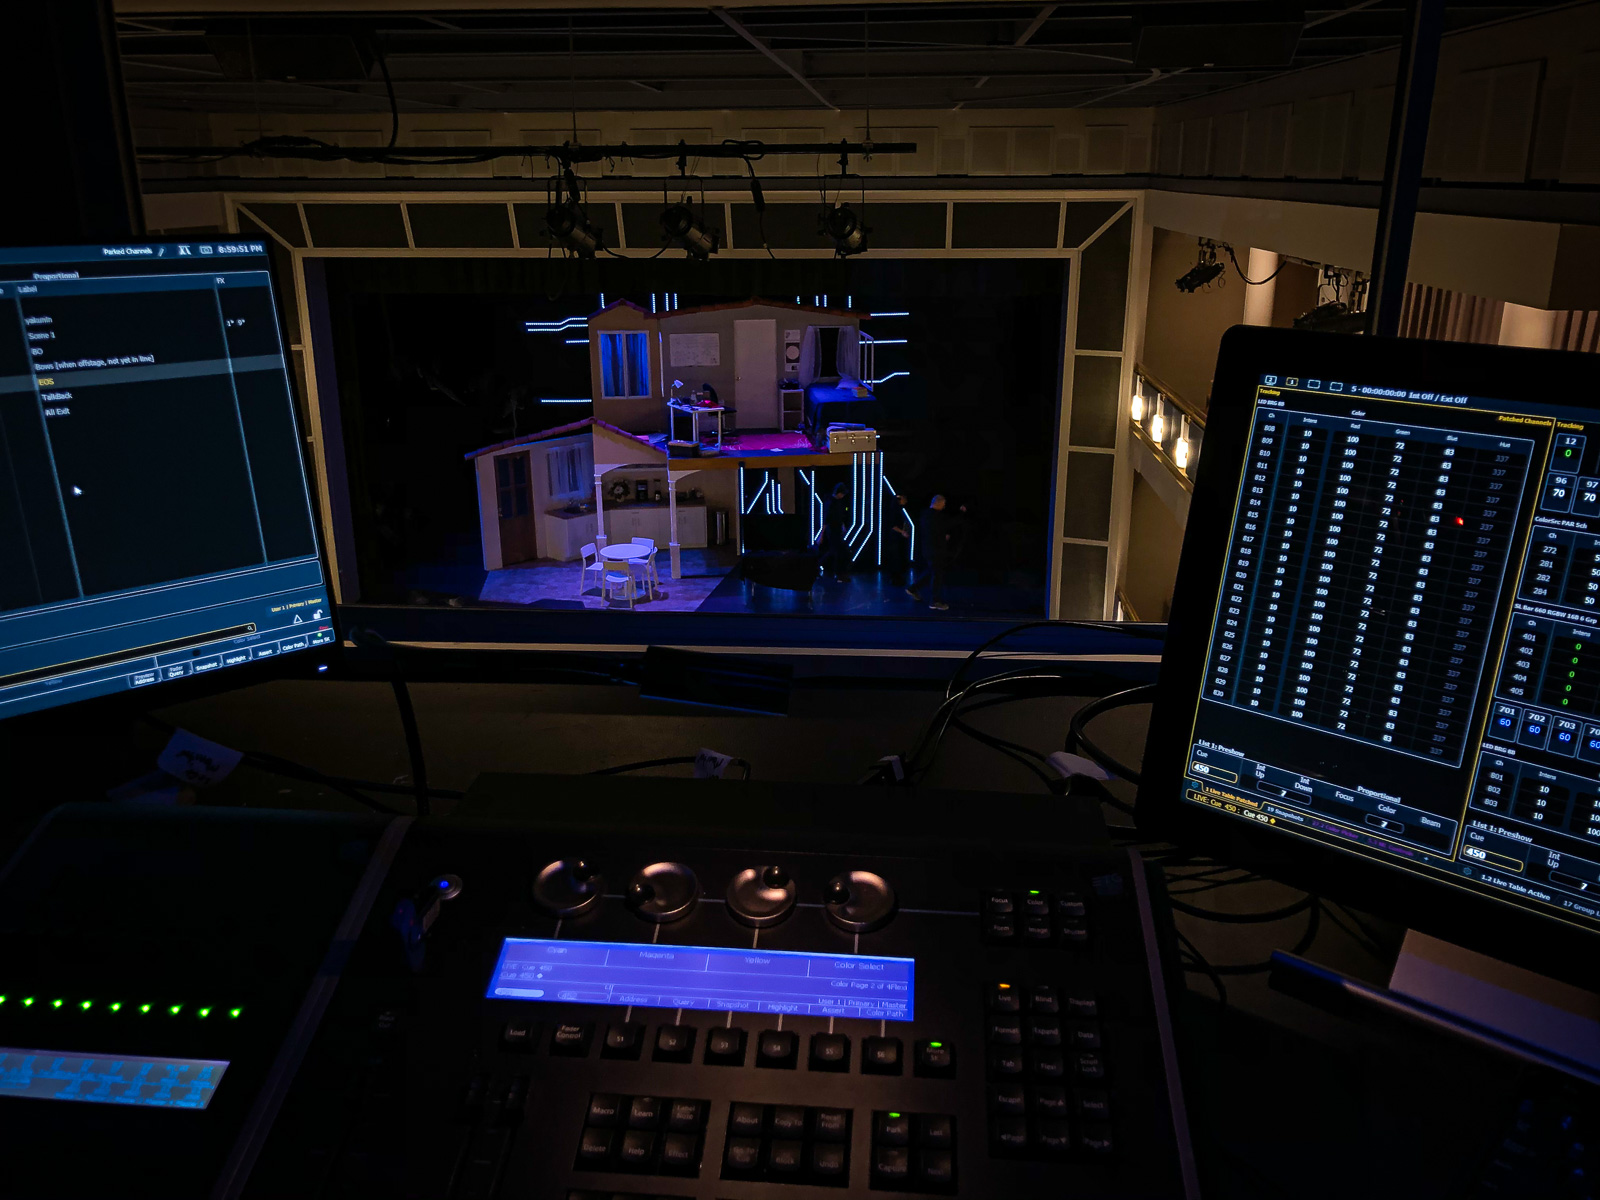
Programming
The DMX decoders allowed me to address and control the LED strips as if they were any other generic RGB LED fixture on stage. Within the ETC EOS software I was able to control the circuits both as individual fixtures and as single pixel mapped group of light bars. This allowed me to elevate their functionality from mere RGB lines to a single fixture capable of color fades, time-based patterns, and easily customizable animations.
Break a leg!
The show went off without a hitch, and as the lighting programmer and board operator for the performances, it was truly a dream come true to see my technical contributions in front of a live audience.
I look back at this experience as one of the most fun and valuable projects I’ve worked on to date, and it’s helped me carve out a niche that merges my technical interests with those in the live performance space. I got the chance to exercise the prototyping process outside of what I considered engineering, and I’m grateful for the challenges I was given to solve.
None of this would have been possible without a team that understood its strengths and weaknesses, and respected the knowledge and insights of the individuals involved.
To this end, I owe a big thanks to the people below:
- Emily McCourt, the production’s lighting designer who believed in me despite timing, budgeting, and technical constraints.
- Mark Lorenzo, the theatre’s technical director who accommodated my wacky ideas and technical needs from start to end.
- Jon Adler, my academic advisor who queued me into this awesome opportunity.
- Wesley Soo-Hoo, friend and fellow student who stayed up late helping me solder countless LED strips together.
- Florian Schwarzinger, fellow theater tech nerd who I consulted for advice on the initial design and power electronics.